Building a Next.js Application with LLM Intergration: A Developer's Guide

Introduction
Welcome to this comprehensive guide on building a Next.js application integrated with a local Language Model (LLM). In this series, we'll walk through creating a system that leverages open-source AI while maintaining performance and code quality.
Before we begin, this tutorial assumes you have:
- Working knowledge of React and Next.js
- Familiarity with JavaScript/TypeScript
- Basic understanding of AI/ML concepts
- Experience with API development
- A local LLM already set up on your machine
If you haven't set up a local LLM yet, I recommend following [this guide on setting up local LLMs] llama.cpp We'll be using DeepSeek 1.5B for this tutorial, but the concepts apply to other models as well.
Phase 1: Project Foundation
Let's begin by creating our Next.js project and establishing a solid foundation for our AI-powered application. We'll start with the basics.
Project Initialization
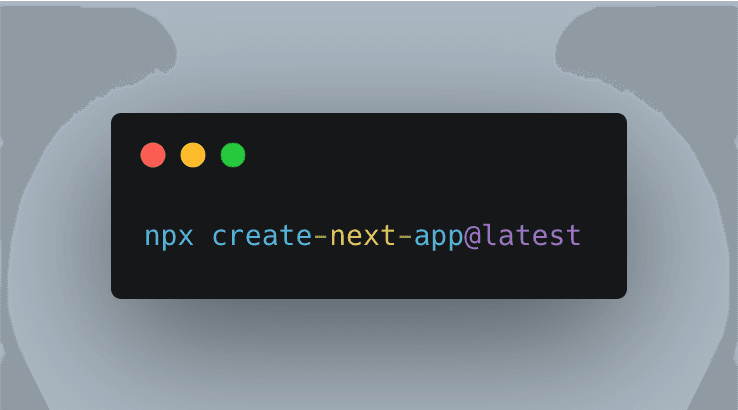
First, let's create a new Next.js project. We'll use Javascript and Tailwind CSS for styling:
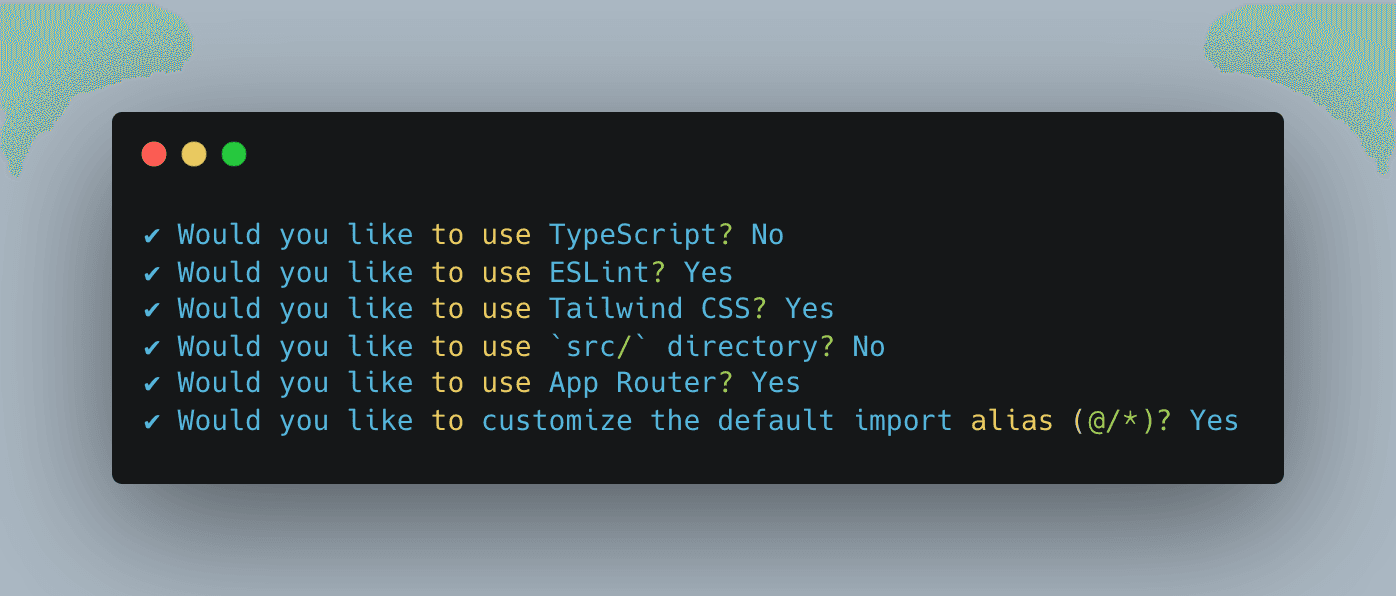
During the initialisation, you'll be prompted with several questions. Here are the settings I chose:
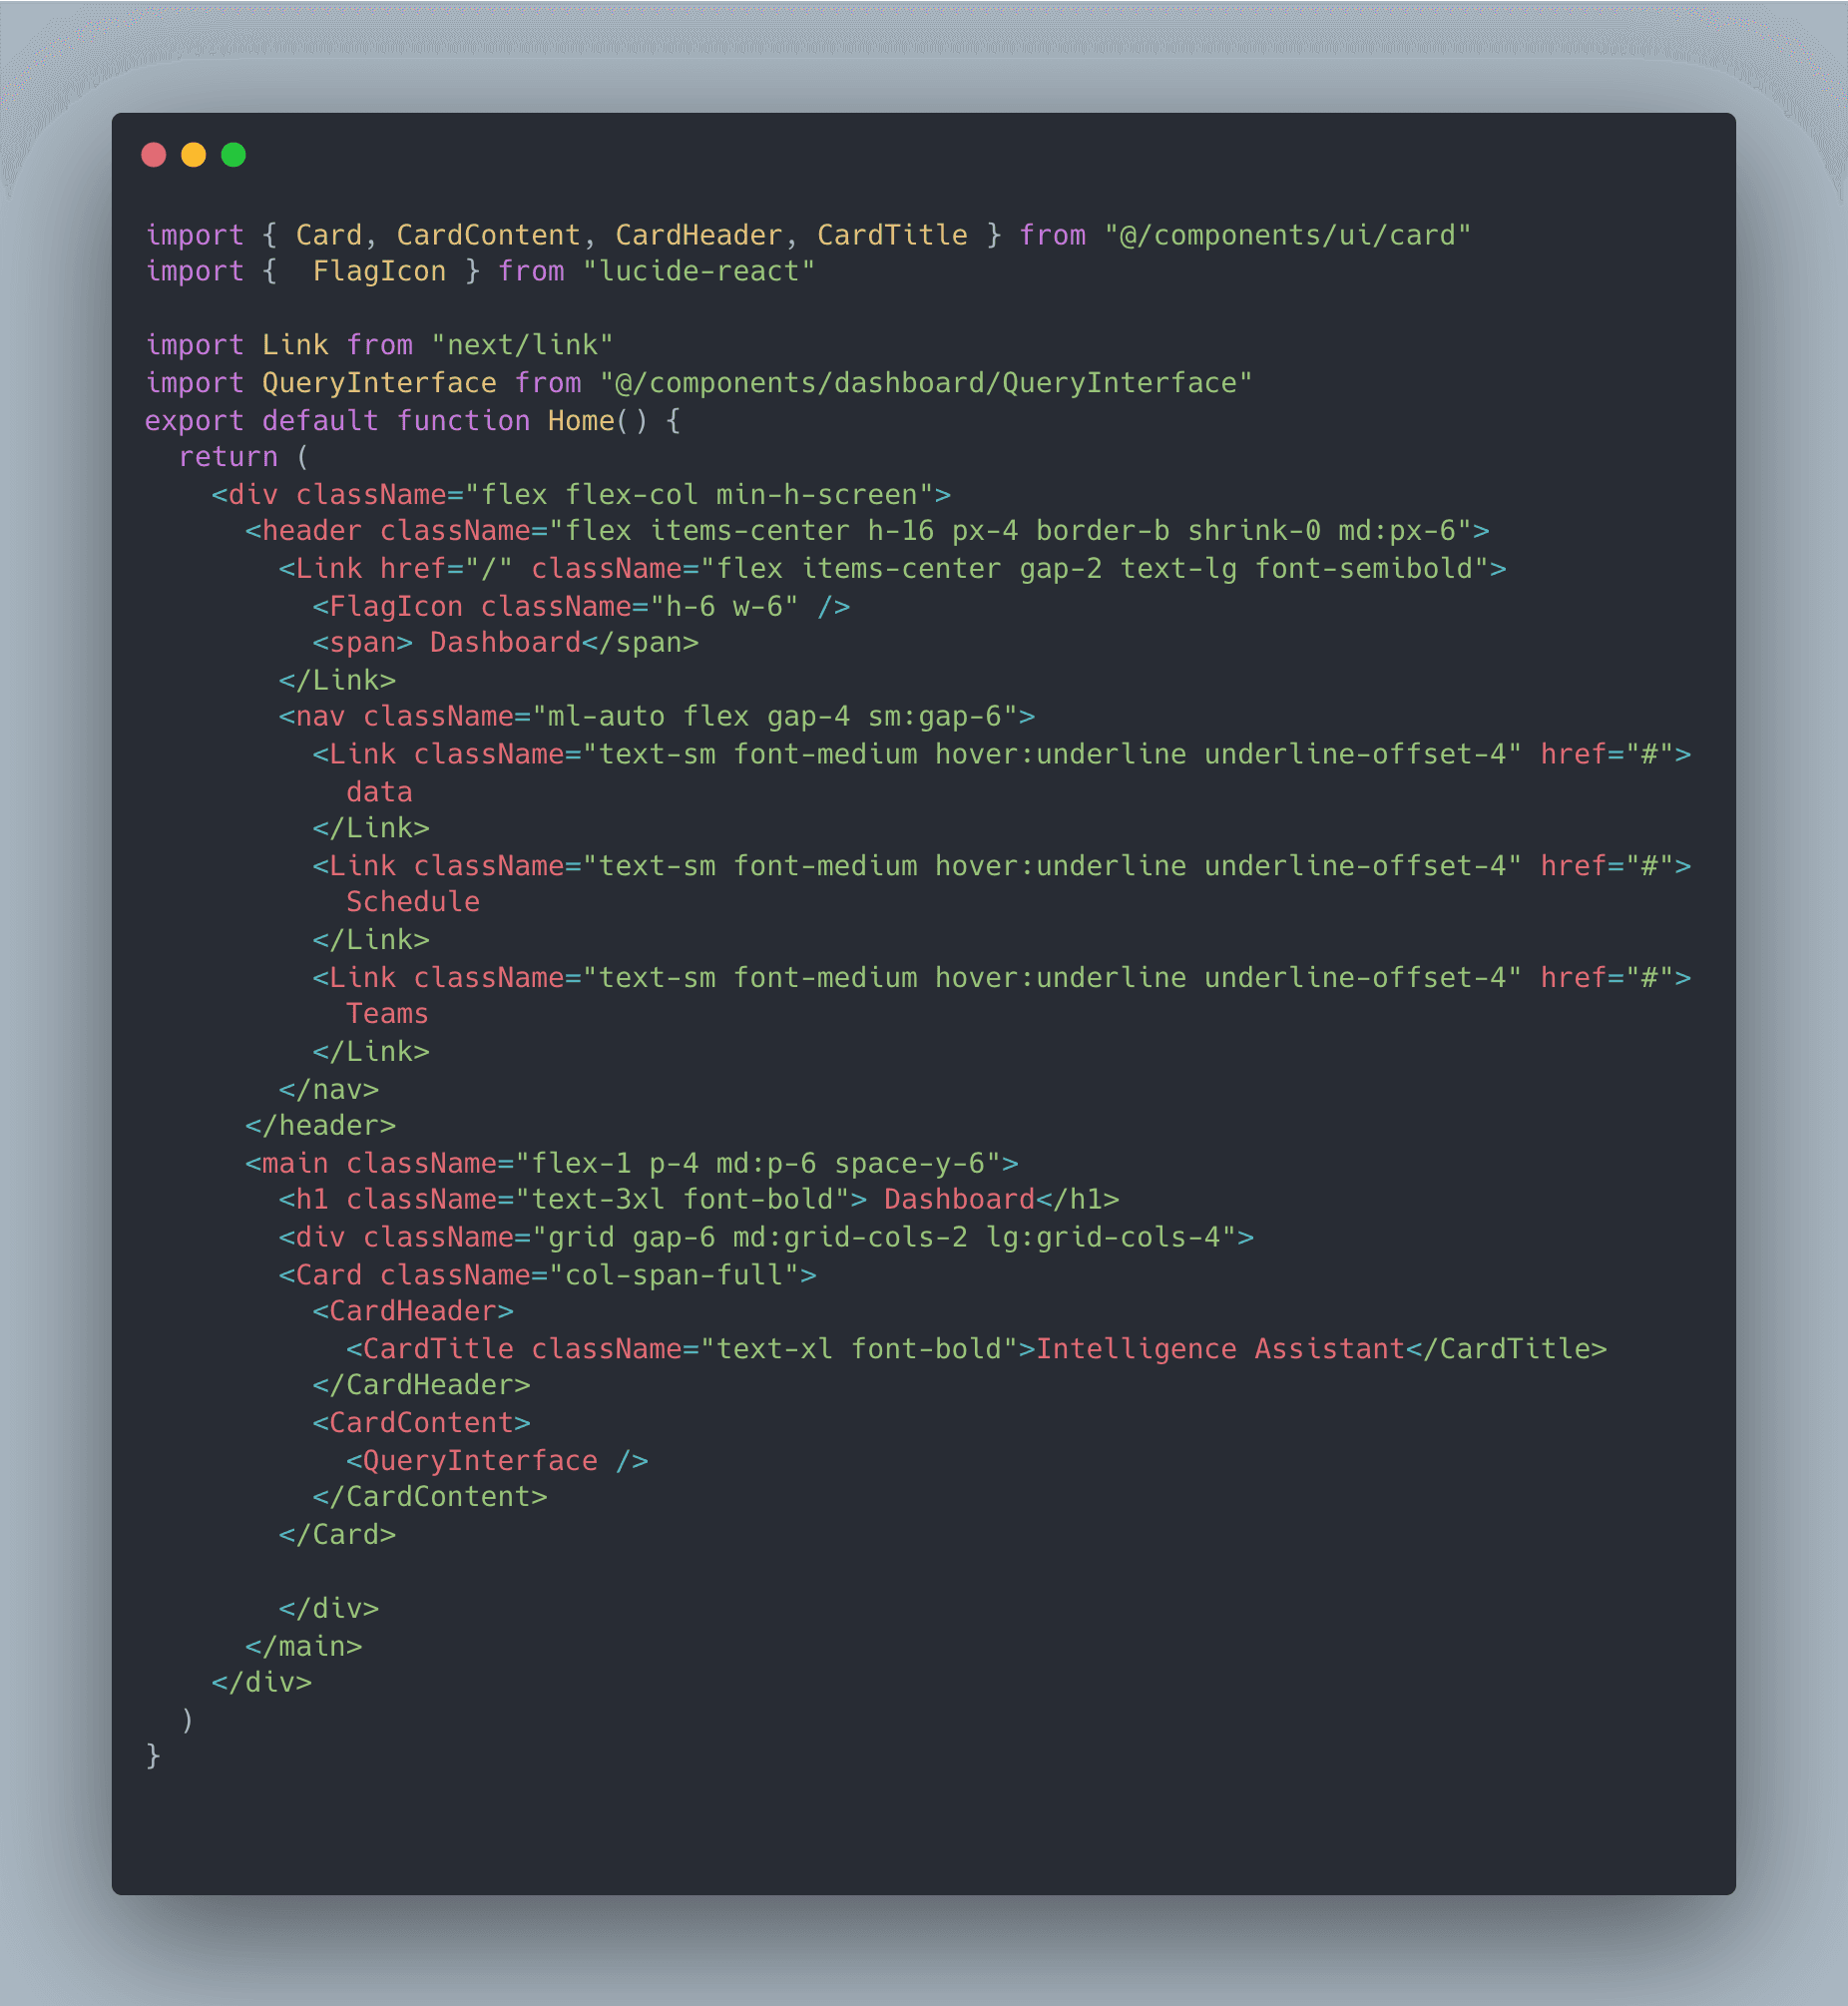
Creating Our Project Structure
First it is important to organise your project in a way that is logical and efficient.
Firstly I recommend creating several directories to organise the code.
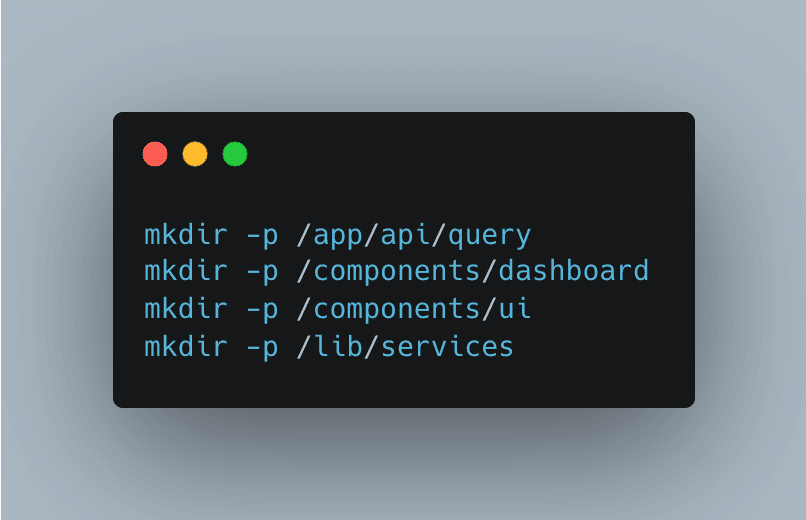
Let's understand what each directory will handle:
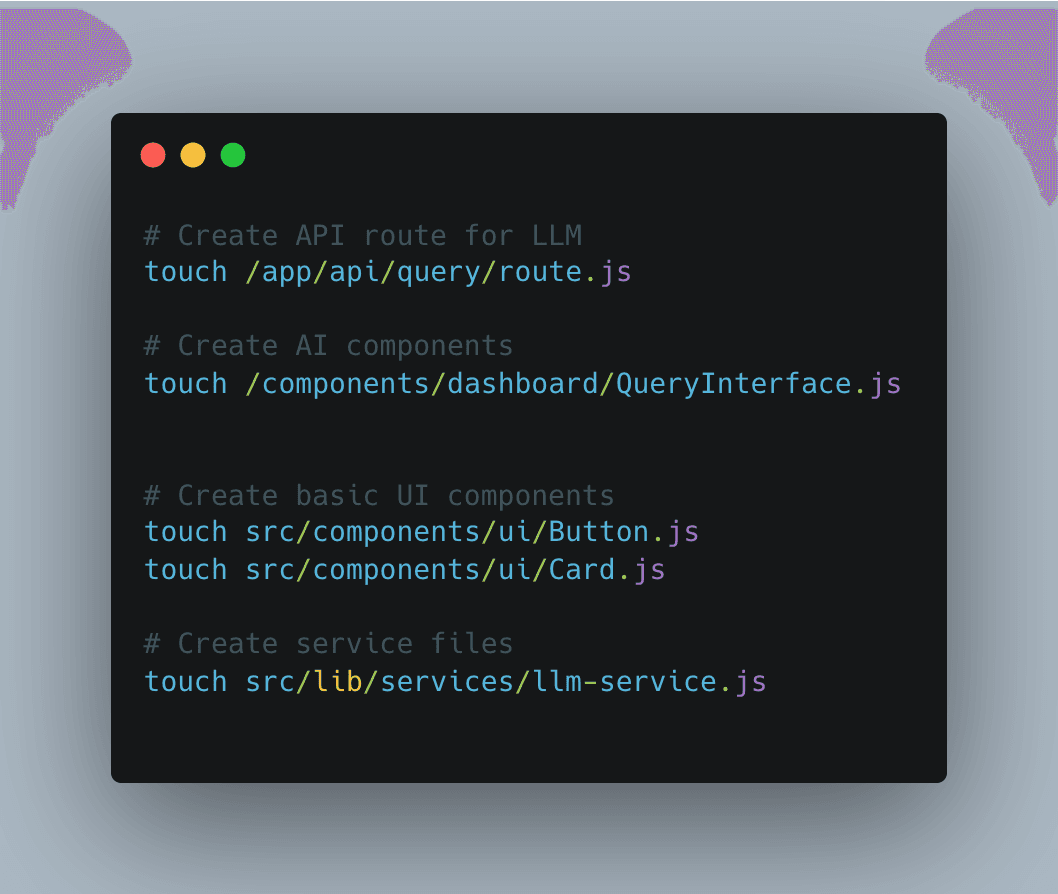
/app/api/query: This directory will contain our API routes for communicating with our local LLM./components/dashboard: AI-specific components like query interfaces ./components/ui: Reusable UI components like buttons and input fields.src/lib/services: Core services including our LLM integration service.
Core Architecture
Our application consists of three main components that work together to provide a seamless AI experience:
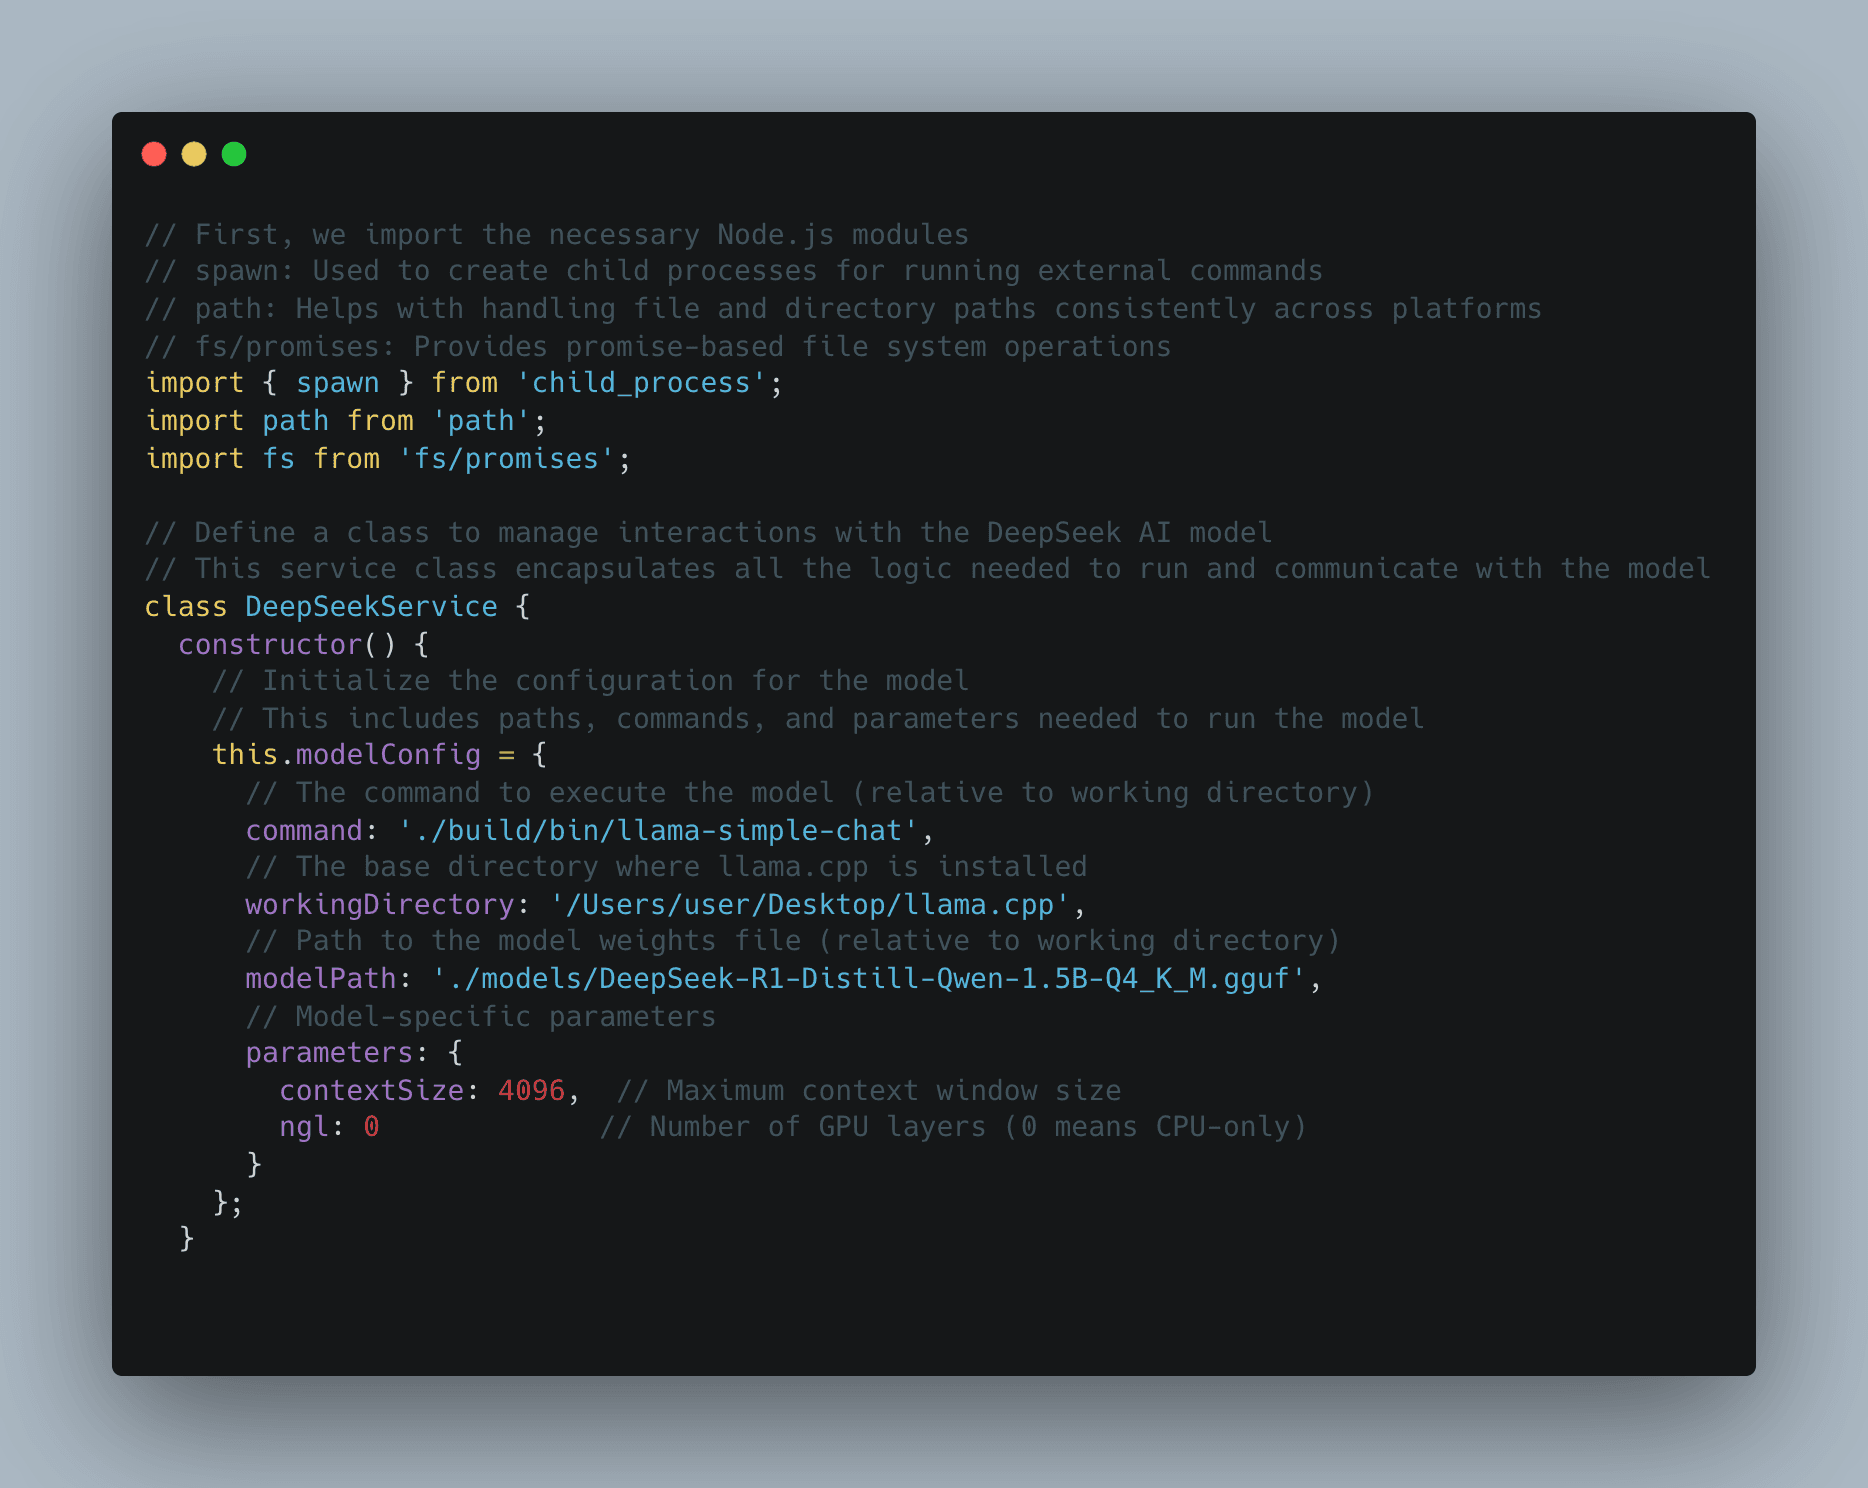
In our AI-powered application, the Model Service (modelService.js) plays a crucial role as the intermediary between the frontend and the locally running AI model. This service is responsible for managing interactions with the DeepSeek AI model running via llama.cpp. It ensures seamless communication, error handling, and efficient processing of user queries. Let’s break down its functionality and how it works under the hood.
Key Responsibilities of the Model Service
- Model Initialization: Sets up the necessary configurations, including model paths, execution commands, and runtime parameters.
- Query Processing: Sends user inputs to the model, processes responses, and returns meaningful outputs.
- Error Handling & Logging: Captures errors, logs execution details, and ensures smooth operation.
- Environment Validation: Verifies if all required files and dependencies exist before starting.
How It Works: Code Walkthrough
Below is the implementation of modelService.js, which facilitates interaction with the AI model:
First we define a Class to manage interactions with the AI model. This encapsulates all the logic needed to run and communicate with the model
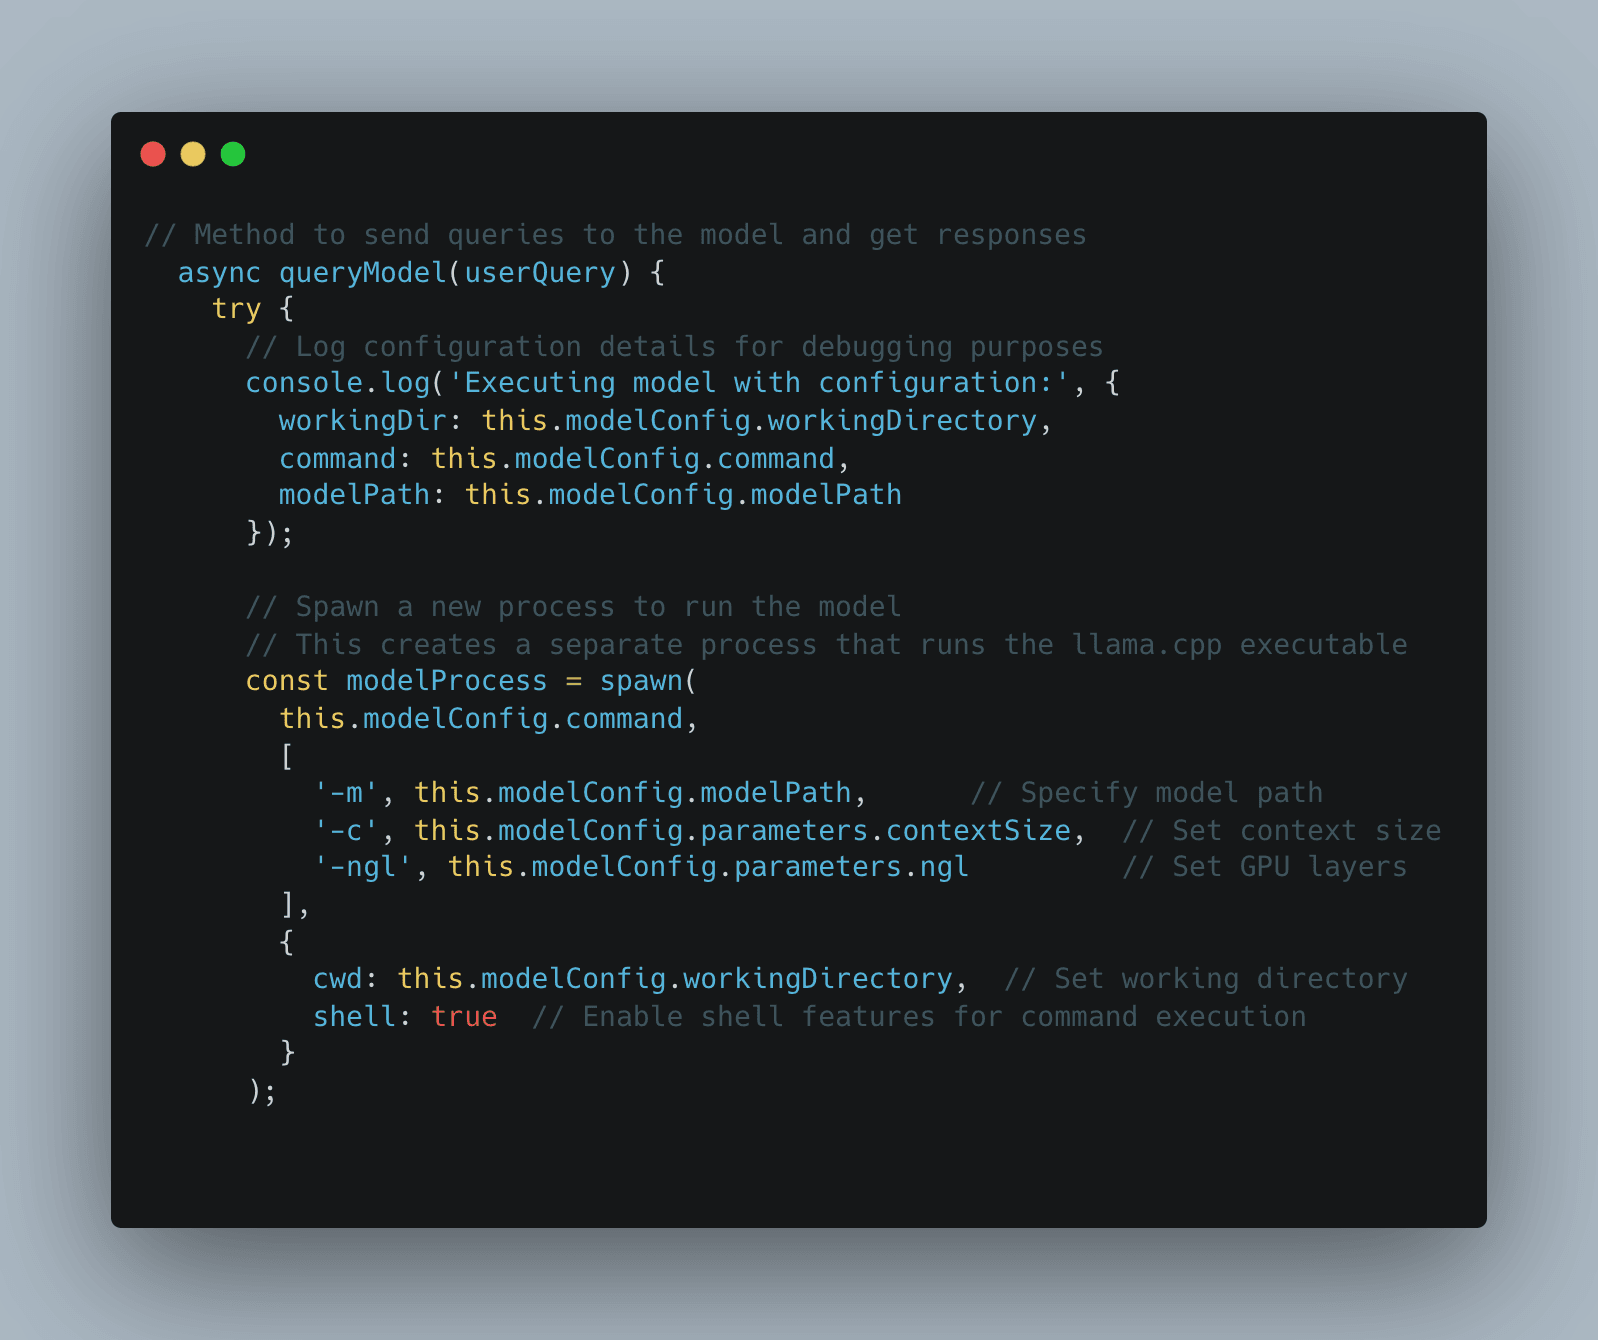
Then with this method we can send the queries to the model and get responses.
We also spawn a new process to run the command we would use on llama.cpp
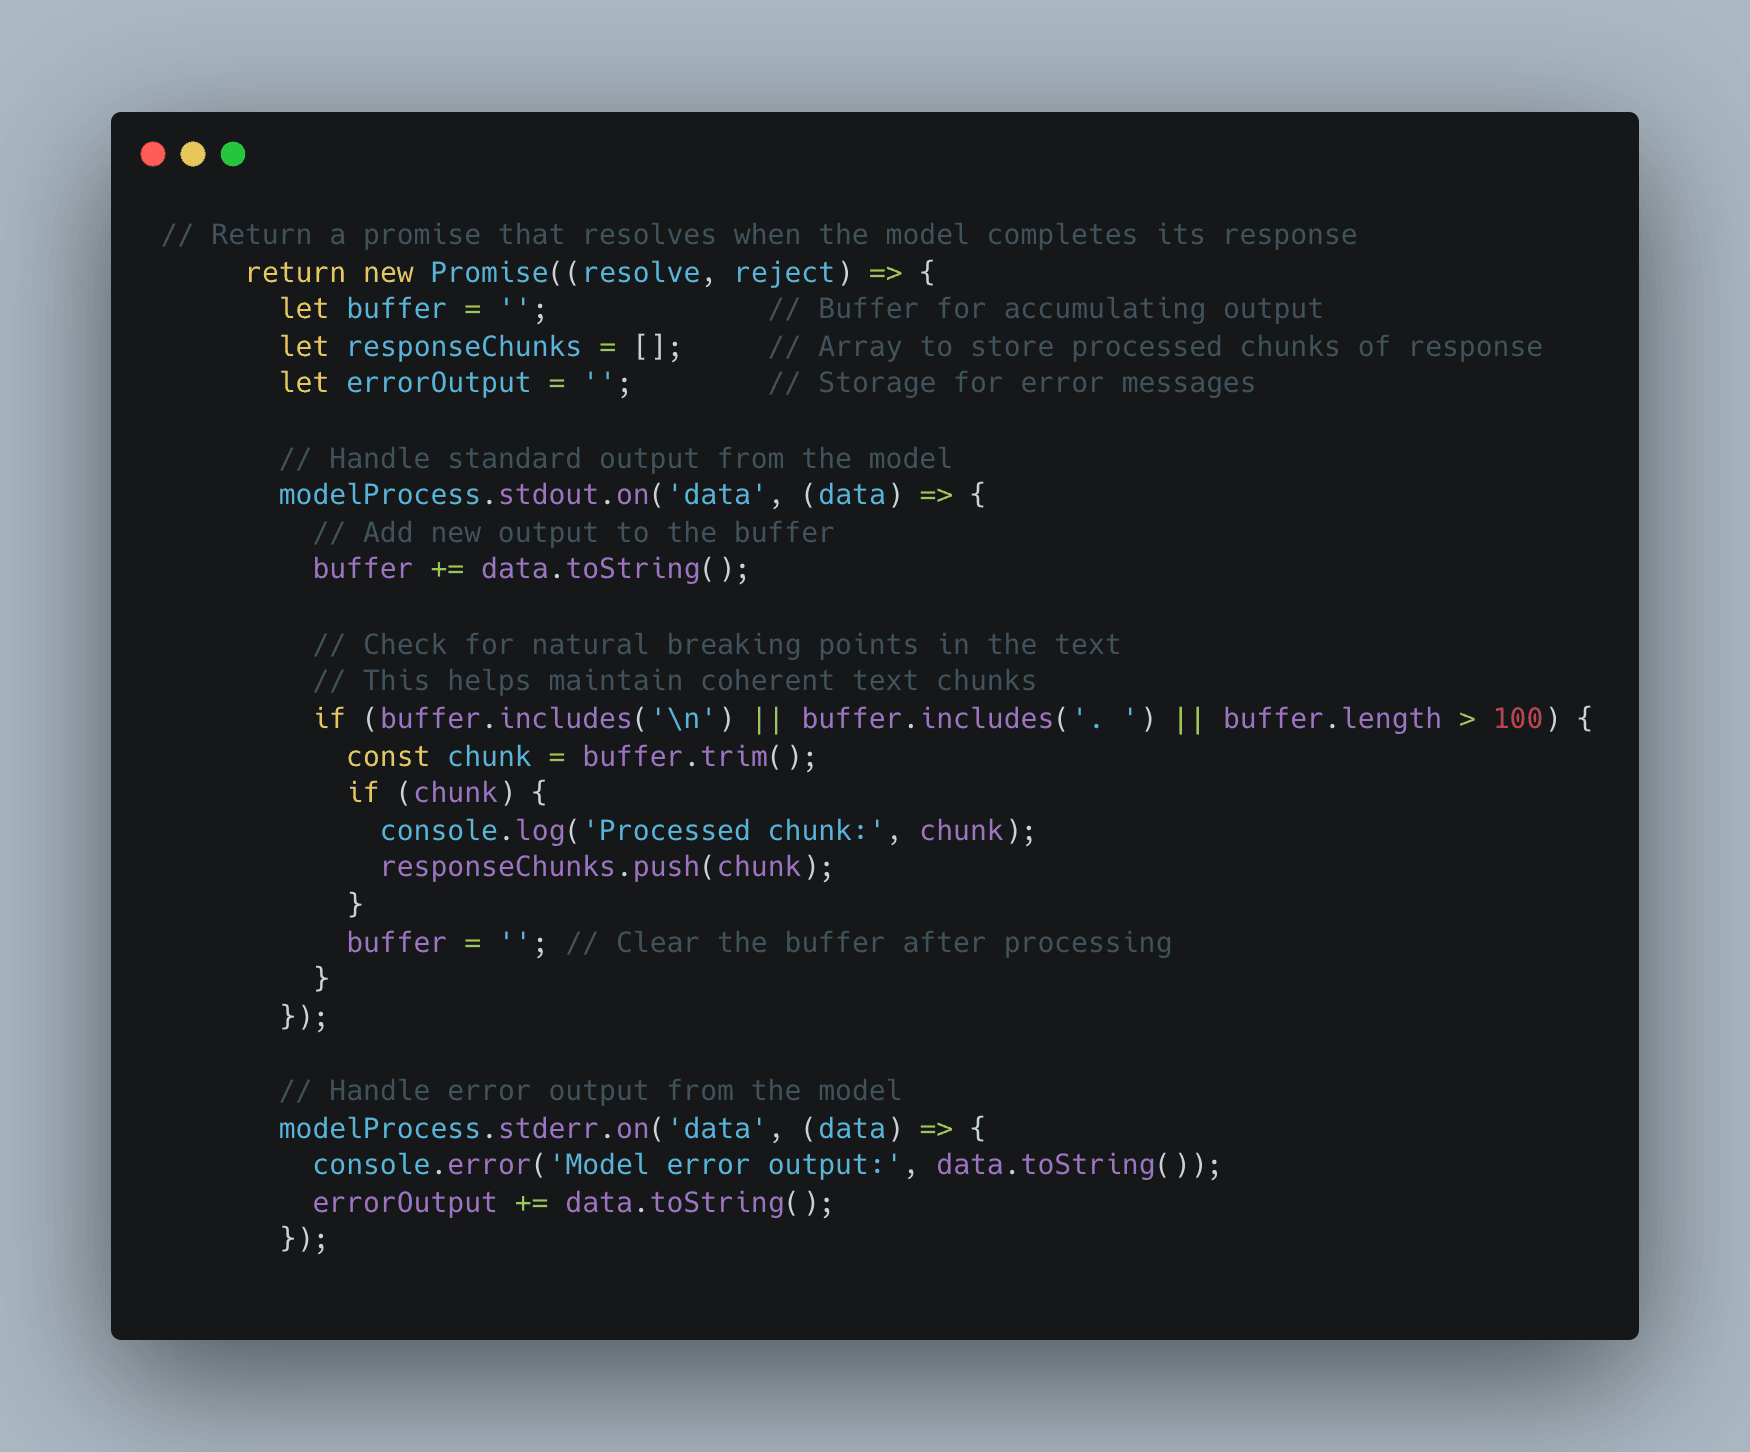
After which we return a promise that resolves when the model completes its response. We also handle the output from the model with a buffer and initialise an array to store chunks of strings at a time and handle any errors accordingly.
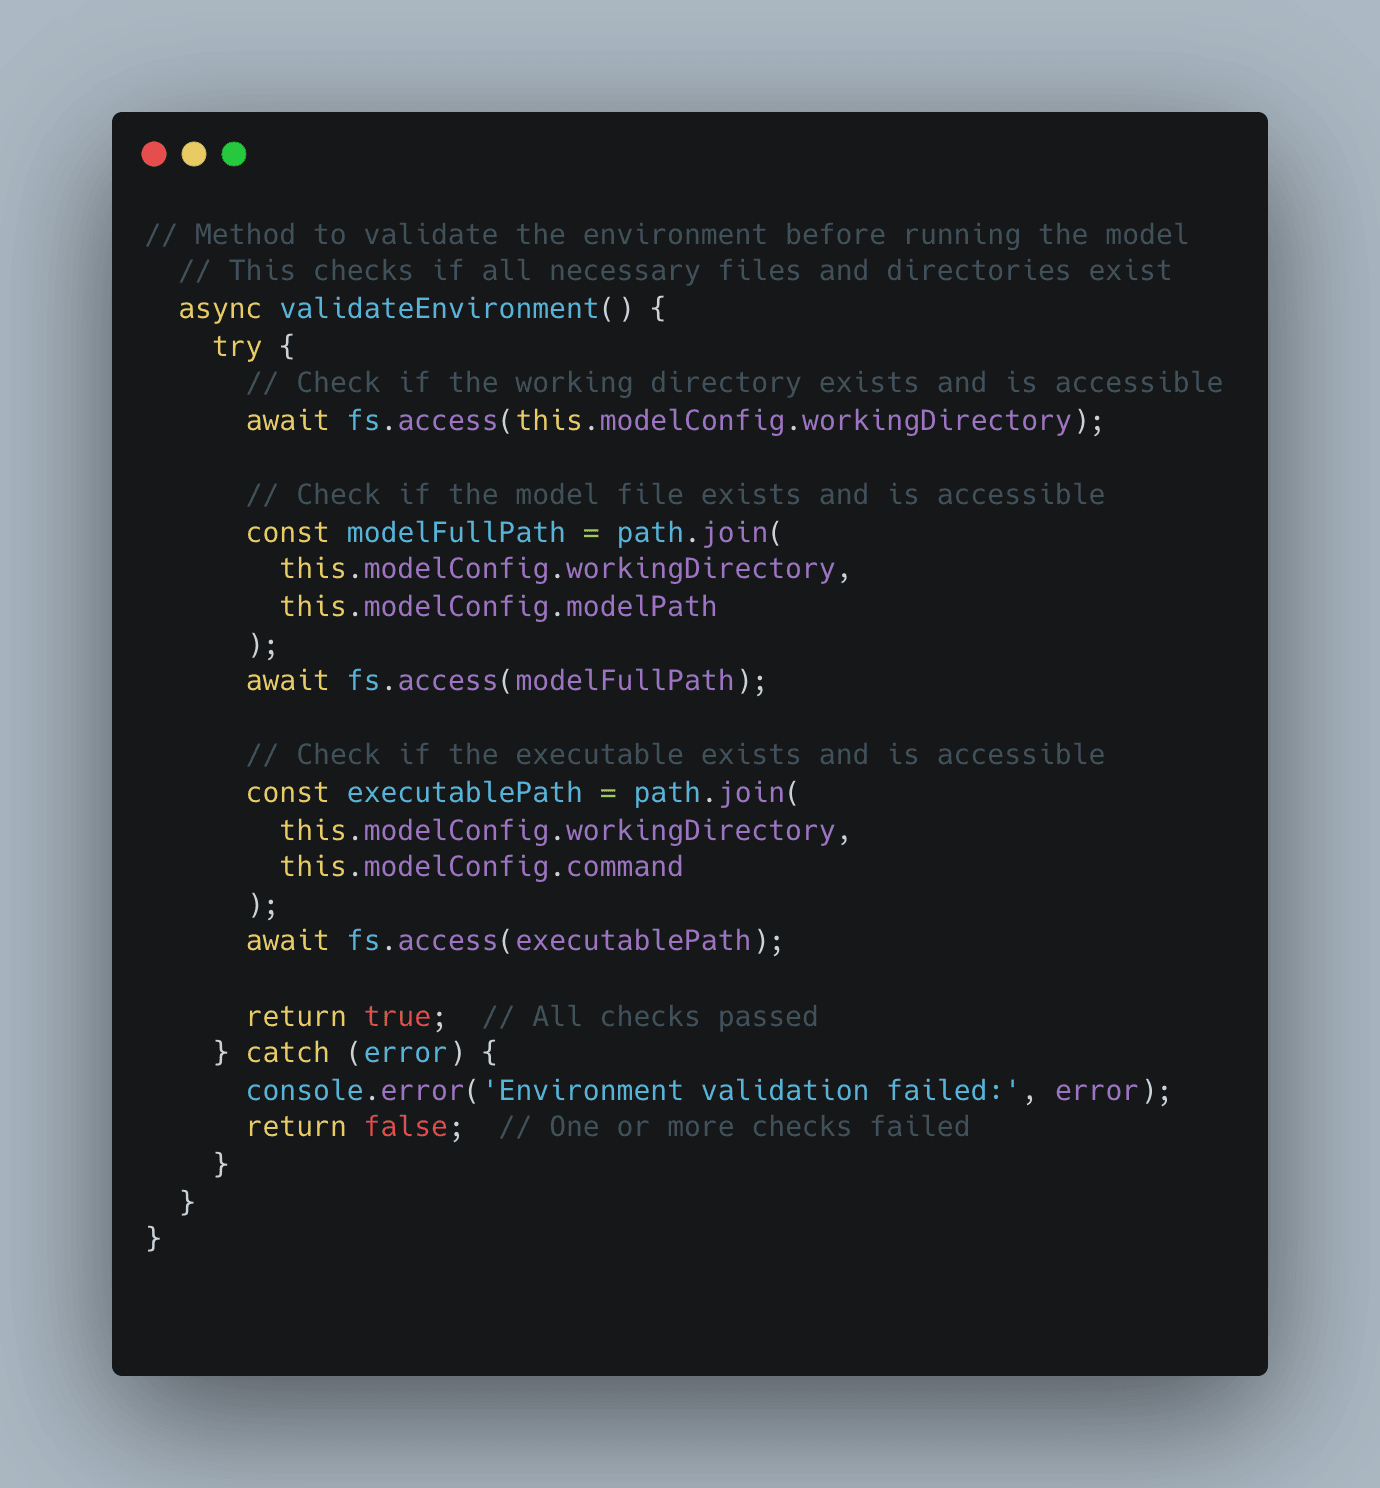
After that we validate the environment before we run the model making sure we have checked if all necessary files and directories exist as well as the executable command to run the model is also functional.
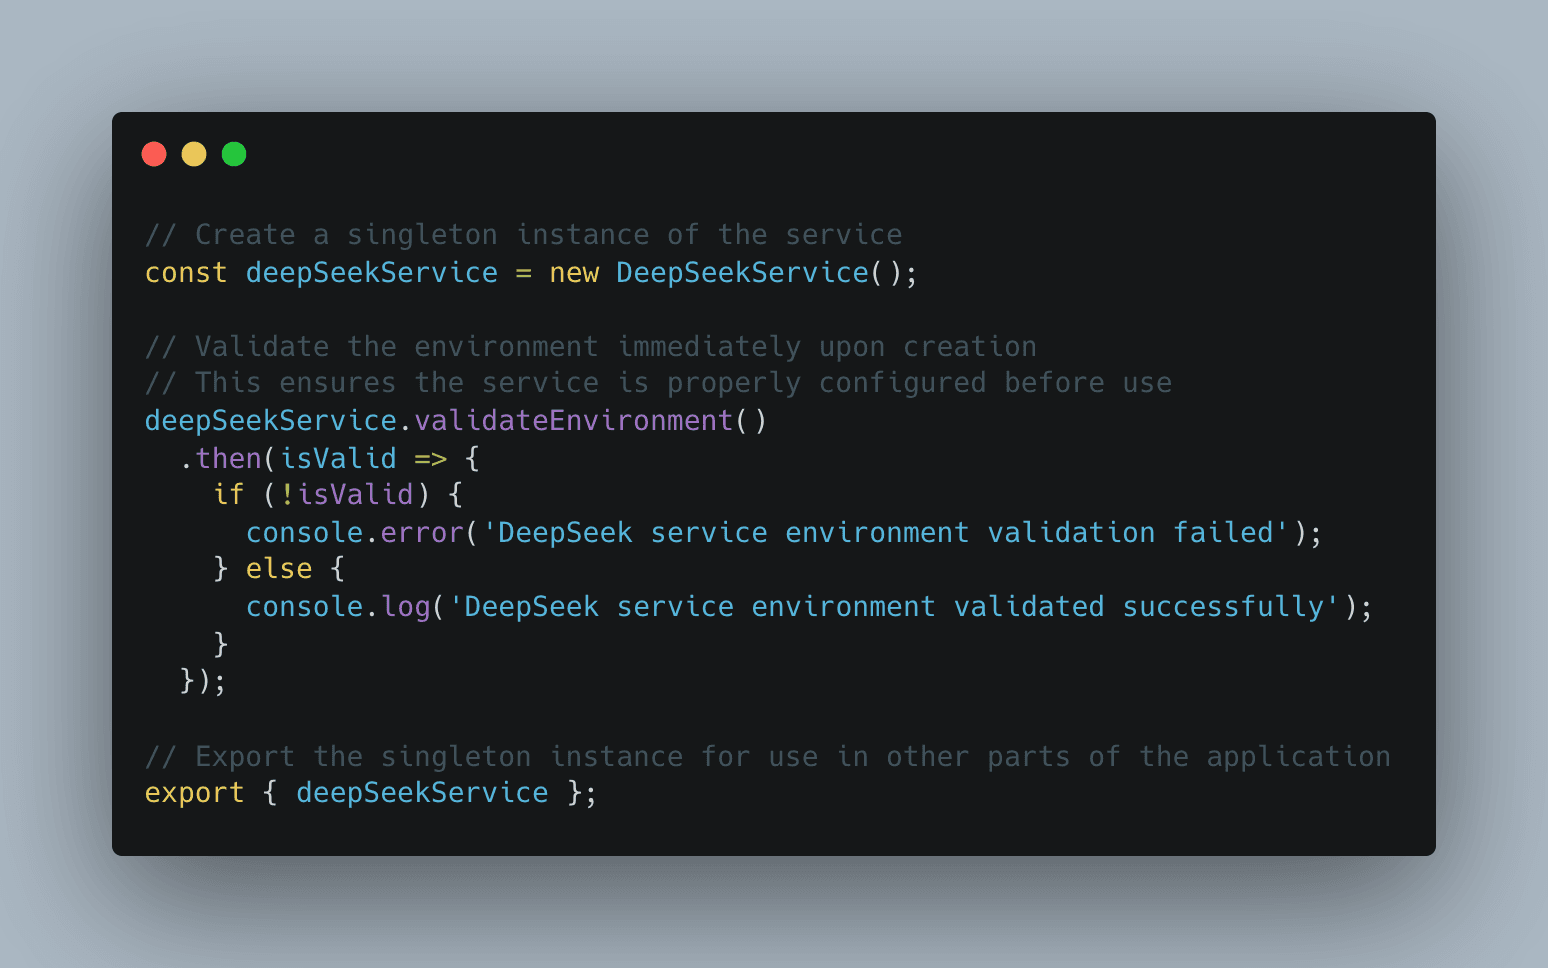
Finally we create a singleton instance of the service to be used and referenced for our client in our /api/query/route.js
Breakdown of Key Features
Spawning a Process
- Uses Node.js’s
spawnfunction to execute the model in a separate process. - Ensures that the AI model runs independently without blocking other operations.
Handling Model Output
- Captures and buffers AI responses efficiently.
- Breaks text into readable chunks before sending it back to the user.
Error Handling & Debugging
- Logs errors and execution details for easier debugging.
- Provides meaningful error messages when failures occur.
Environment Validation
- Ensures necessary files exist before running the model.
- Prevents runtime issues due to missing dependencies.
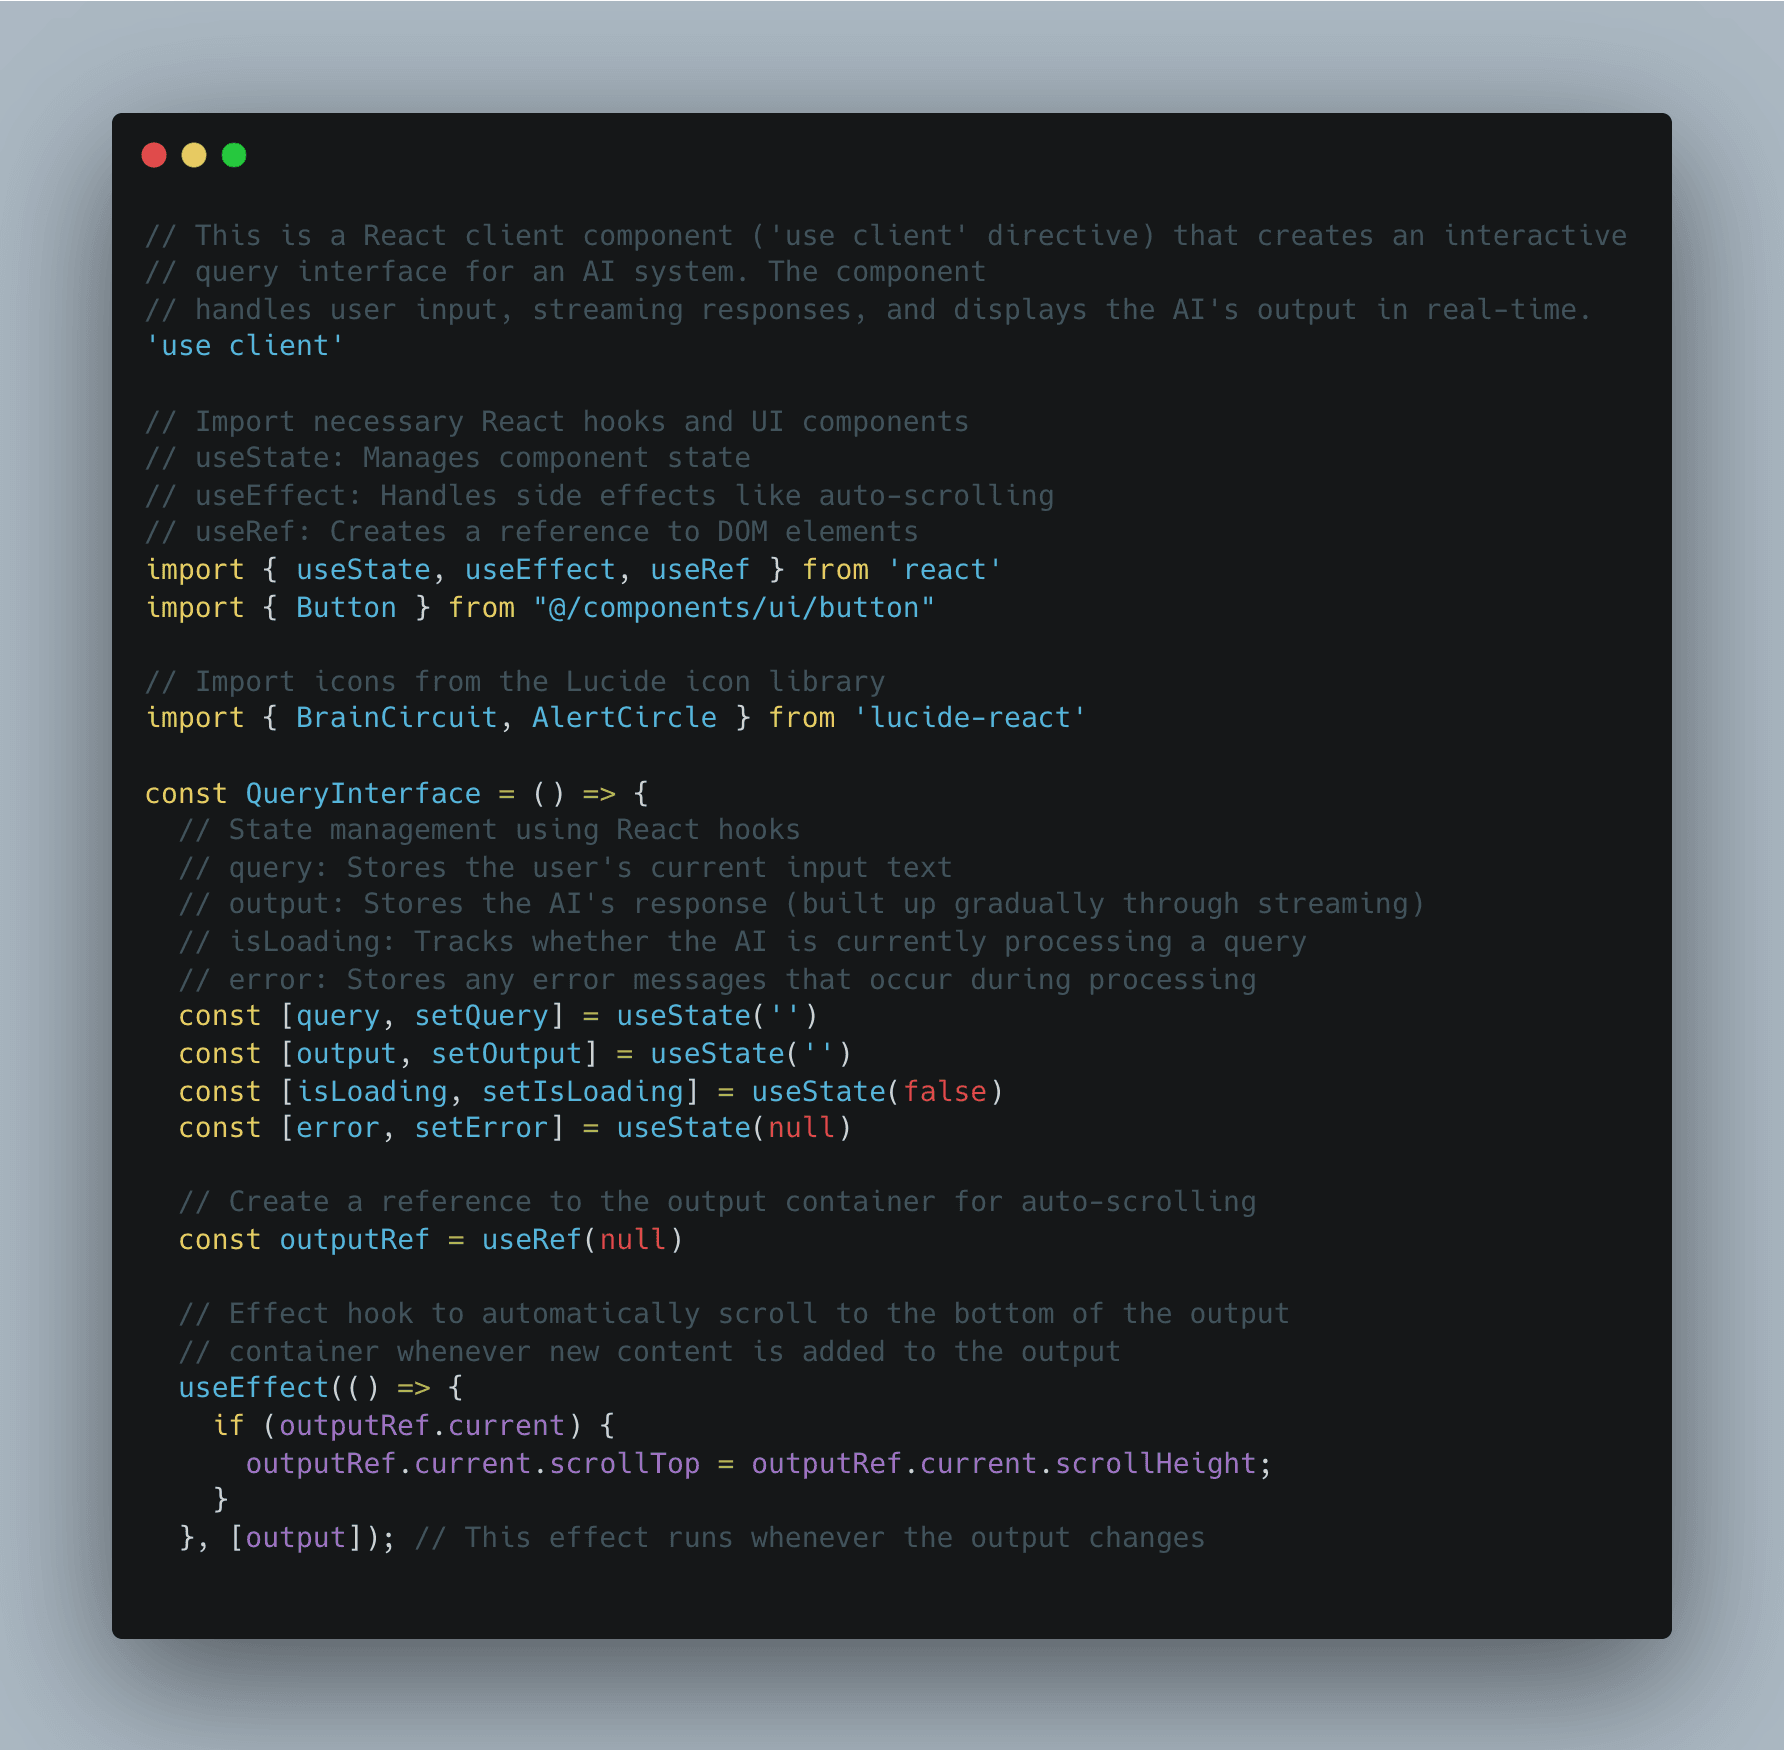
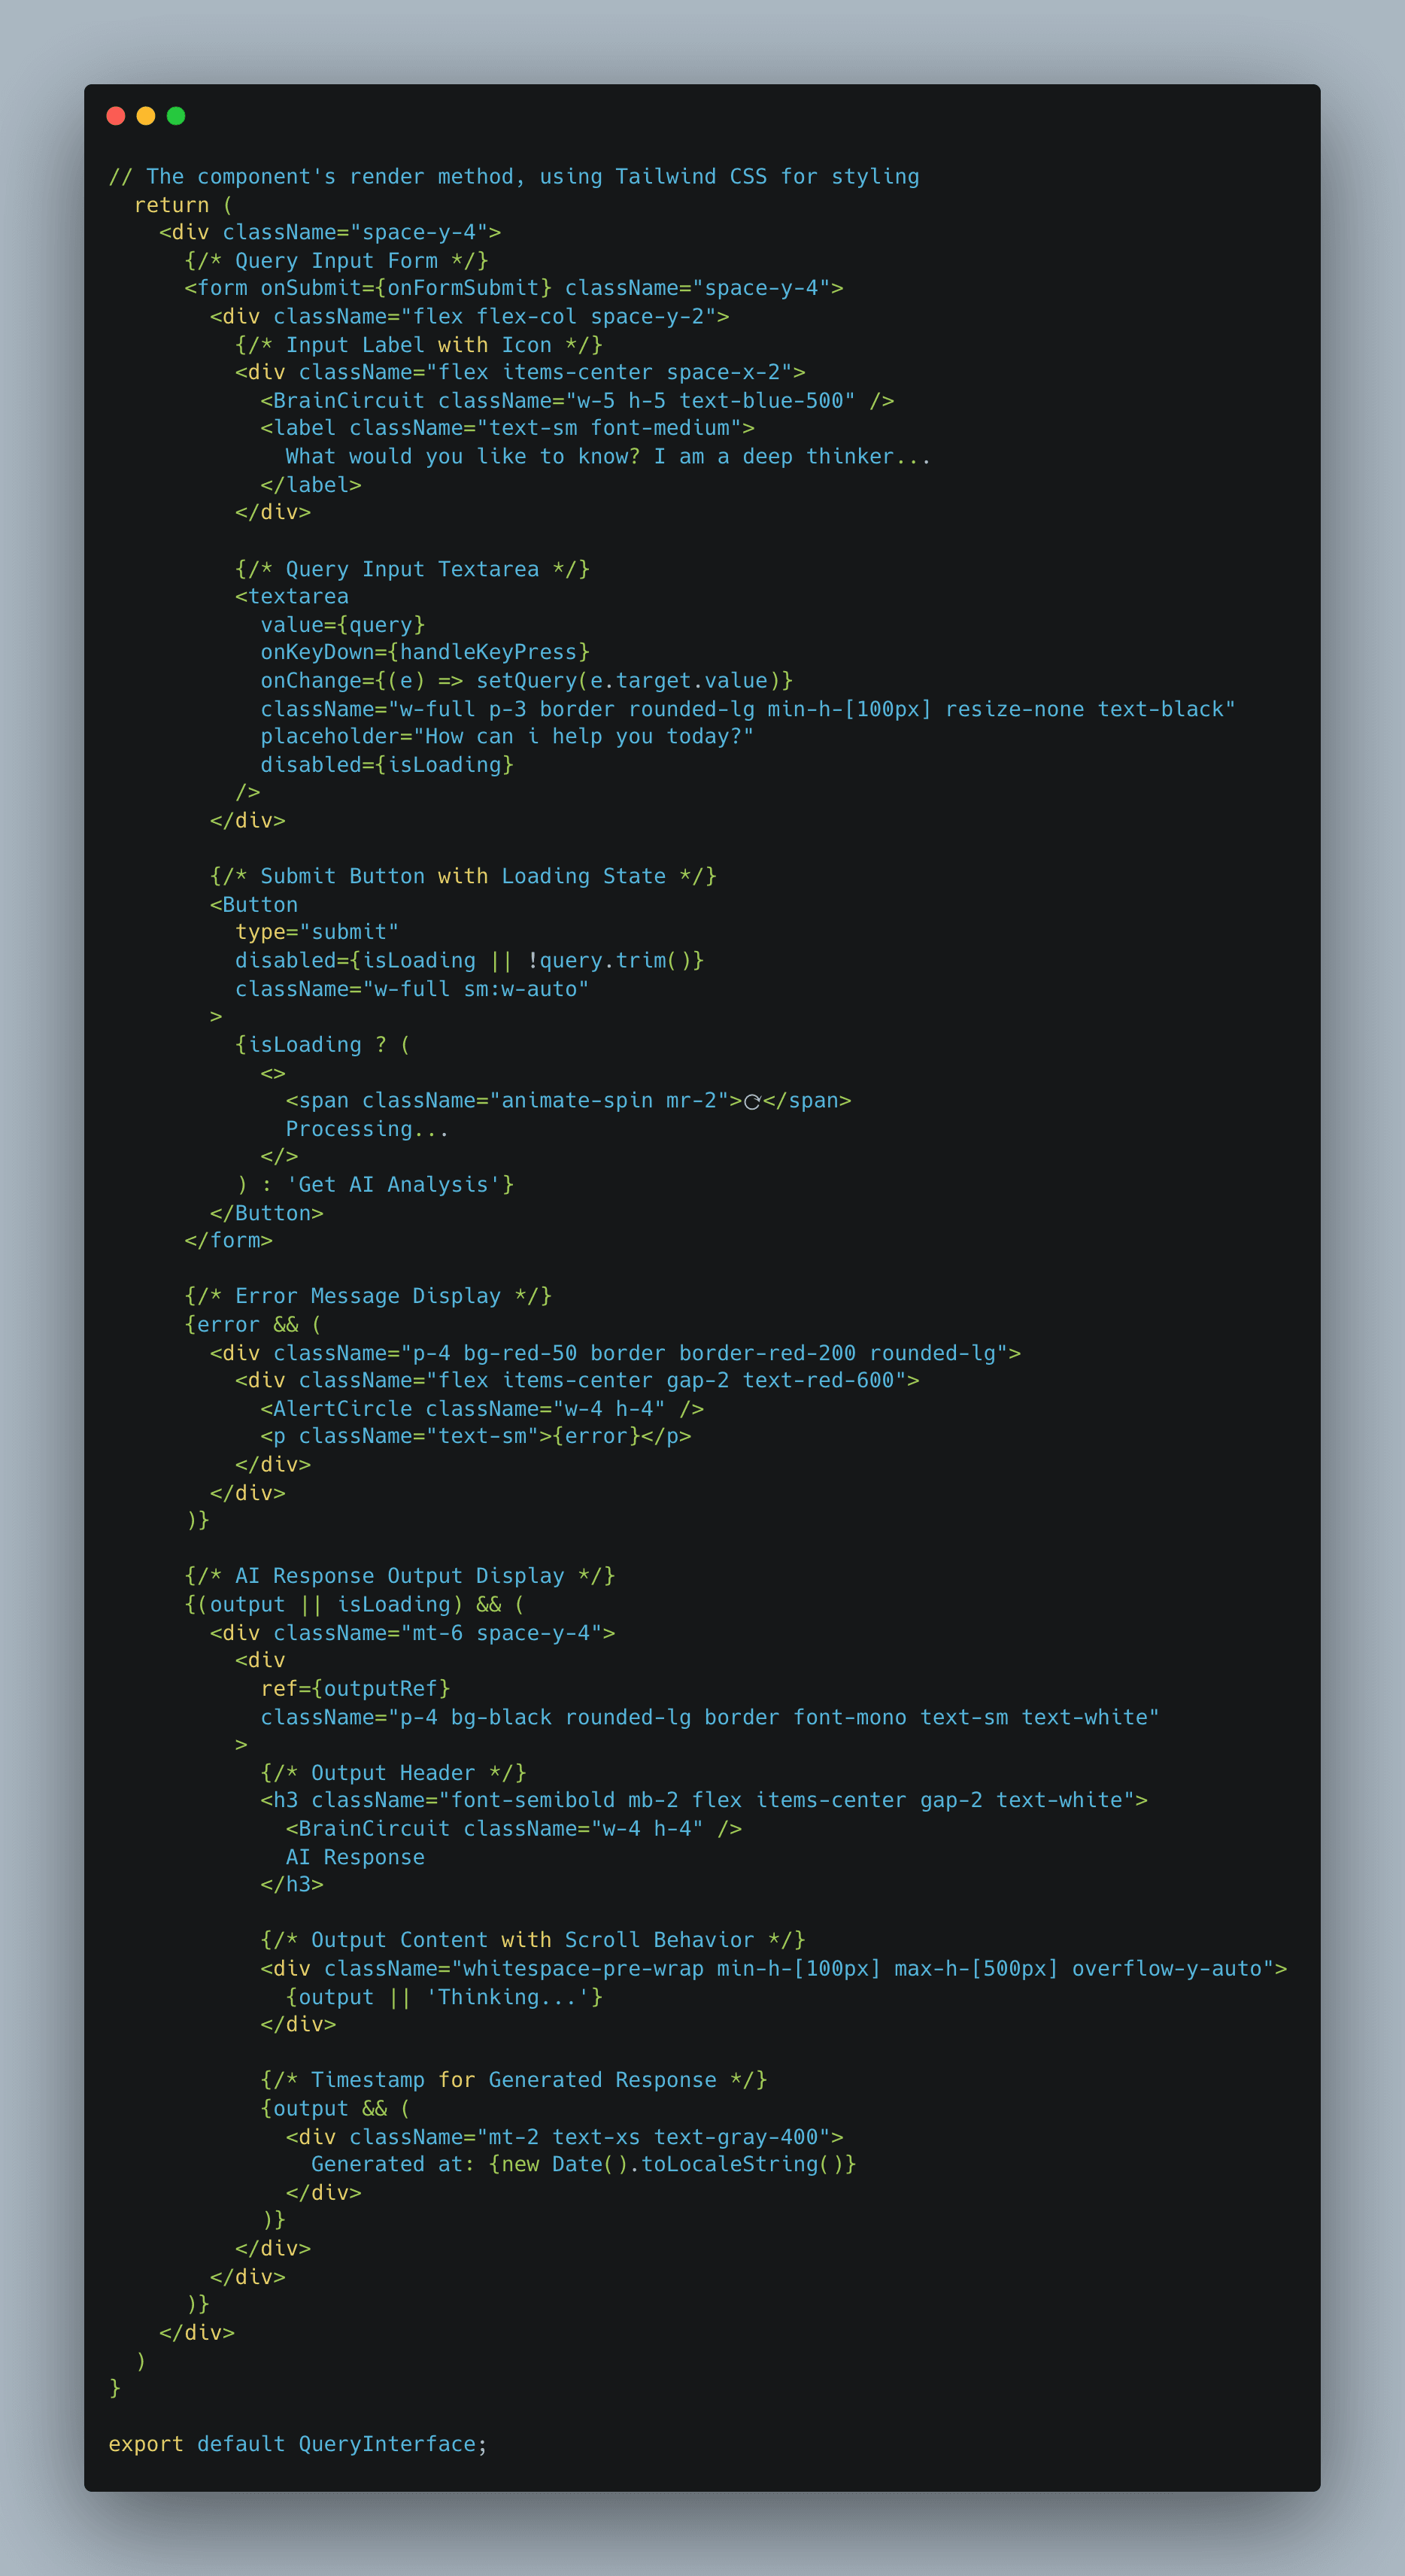
Understanding the Query Interface Component
The QueryInterface component is a React client-side component designed to create an interactive query interface for an AI model. This specific implementation is tailored for answering questions, providing users with real-time responses.
Key Features
User Input Handling:
- A controlled text area allows users to input queries.
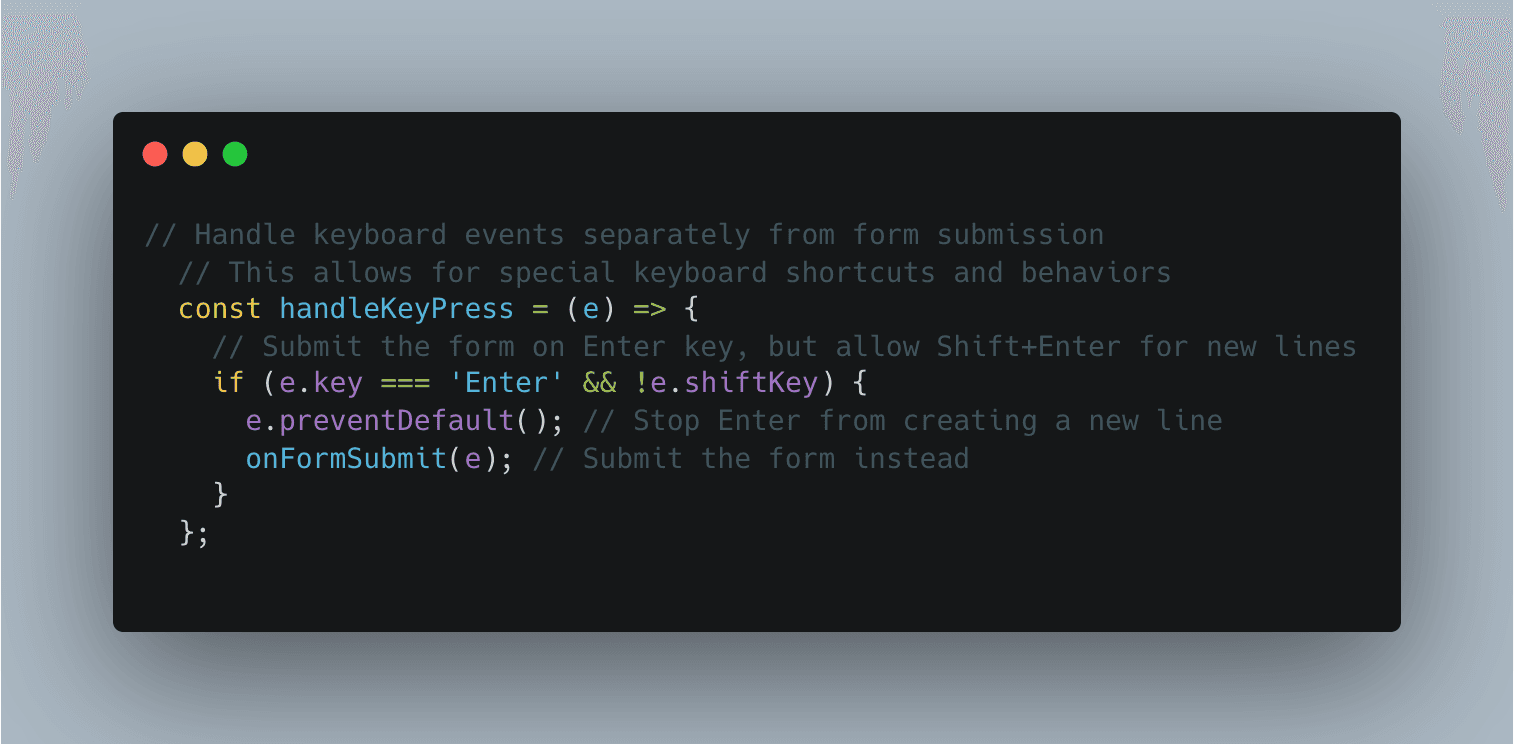
- Handles the Enter key for submission and Shift+Enter for multi-line input.
Streaming AI Responses:
- Uses the Fetch API to send queries to a backend (
/api/query). - Processes the response as a readable stream, allowing real-time updates.
State Management:
query: Stores the user's input.output: Stores the AI's response, updating dynamically.isLoading: Tracks whether a request is in progress.error: Captures any API errors.
Auto-scrolling Behavior:
- Uses
useEffectanduseRefto automatically scroll to the latest AI response.
User Feedback and UI Enhancements:
- Displays an error message when an issue occurs.
- Provides a loading indicator to inform users of ongoing processing.
- Uses Tailwind CSS for styling and a minimal, clean layout.
Implementation
Below is the complete QueryInterface.js code that powers this functionality
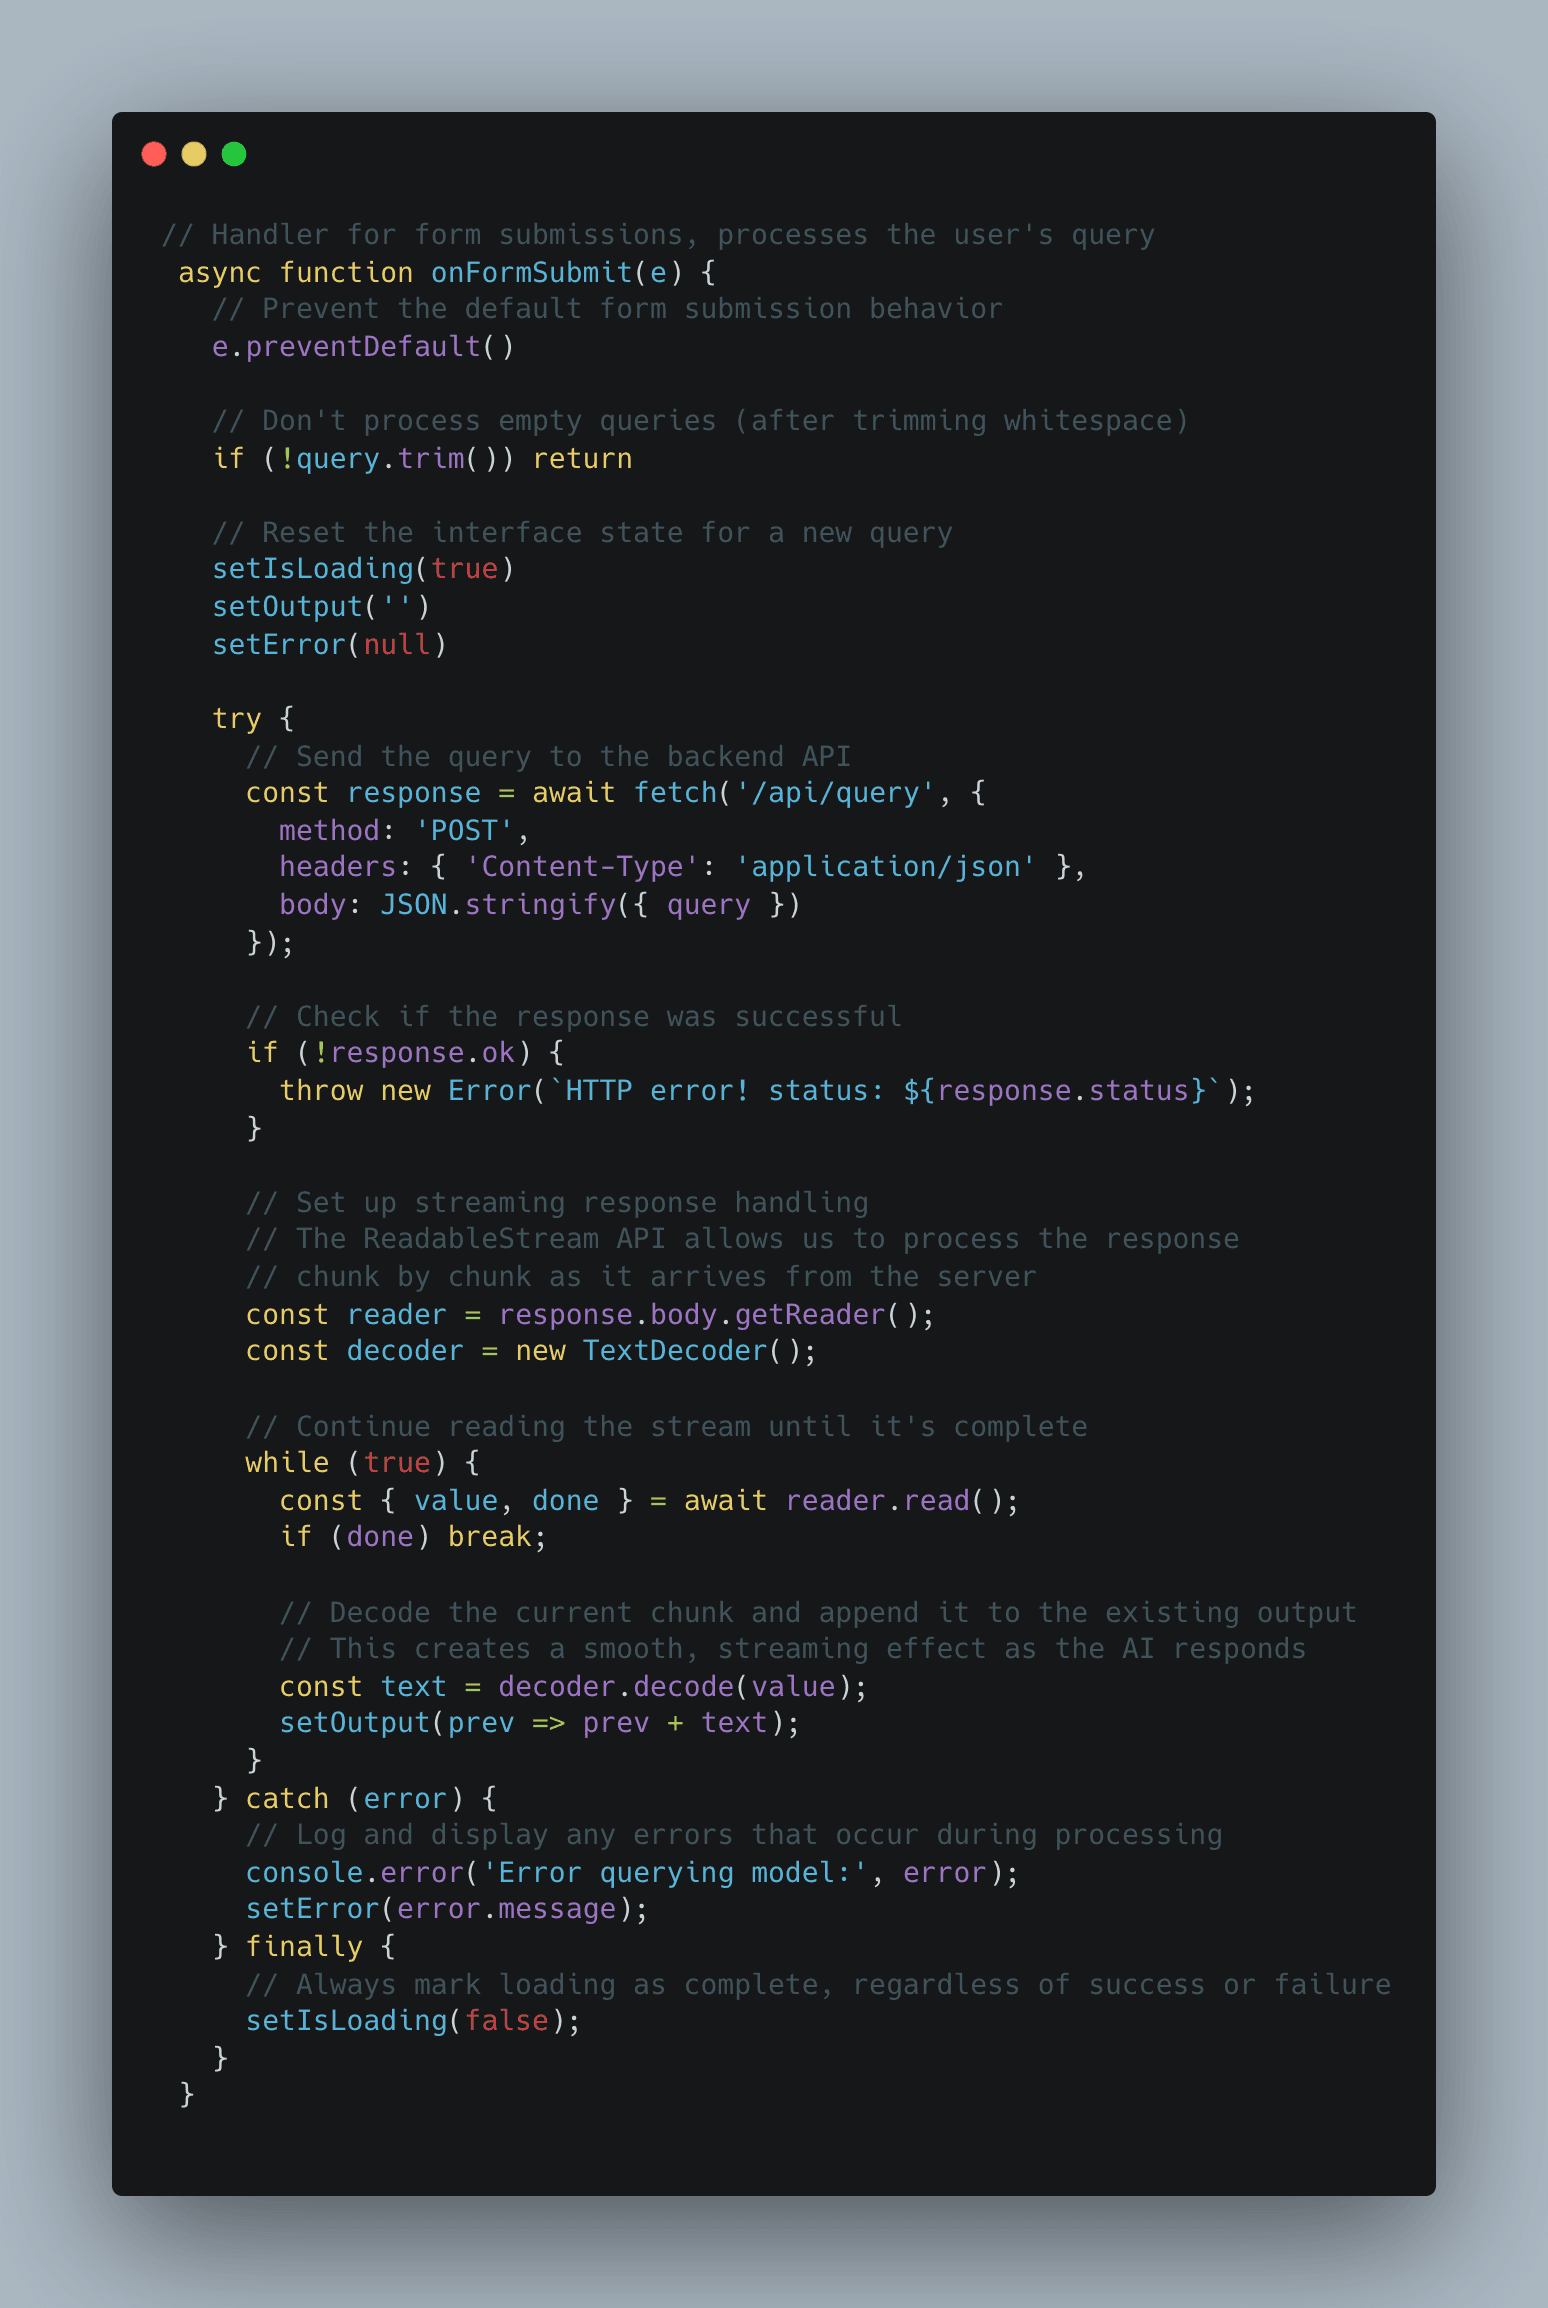
This React Client component creates and interactive query interface for the AI model. The component handles user input, streaming responses and displays AI output in real time. We will be managing the states for loading, output, query and errors.
we will handle the form submissions to help process the user's query.
then we attach a try and catch block to fetch from the api we will create to talk to our backend Service.
This will allow for special shortcuts and behaivors.
Finally the JSX to put it all together. Very Straight forward.
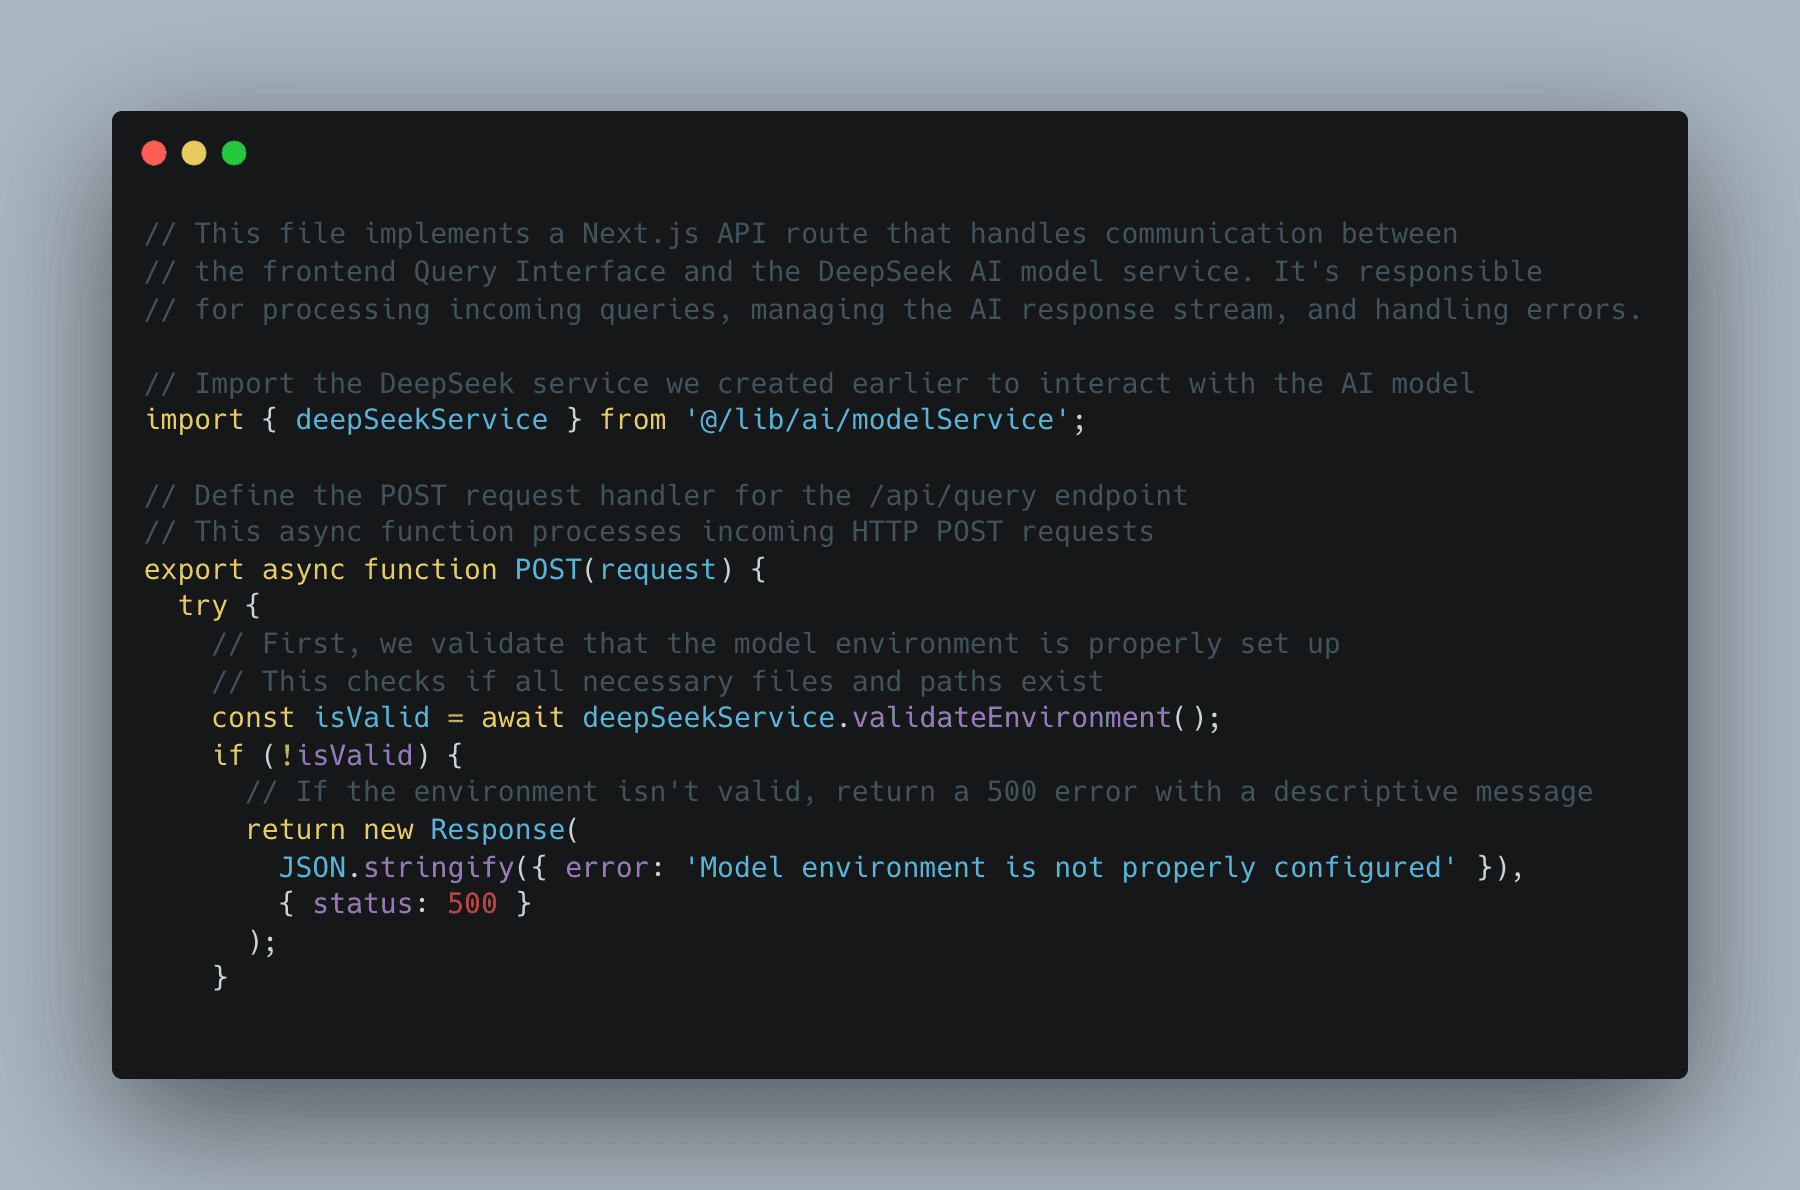
Understanding the API Route in Our AI-Powered Application
In our Next.js application, the API route (route.js) plays a crucial role in bridging the gap between the frontend Query Interface and the DeepSeek AI model service. It ensures seamless communication by handling requests, managing streaming responses, and dealing with errors efficiently. Let’s break down how this component works and provide the necessary code to implement it.
What Does the API Route Do?
- Receives user queries: The frontend sends user input to this API endpoint.
- Validates the model environment: Ensures all necessary files and configurations are in place before processing.
- Handles streaming responses: Streams AI-generated responses back to the user, providing real-time interaction.
- Manages errors gracefully: Catches issues and returns meaningful error messages.
Code Implementation
Below is the complete implementation of route.js, which handles AI queries:
The first thing we do is import that instance we made in our modelService.js
Then define an async function POST(request) and validate the model environment to return the response.
After that extract the query from the request body and parse the JSON body ensure the query isn't empty and return the Response. Then create a Readable stream function that processes the request to a response encoded in a chunk
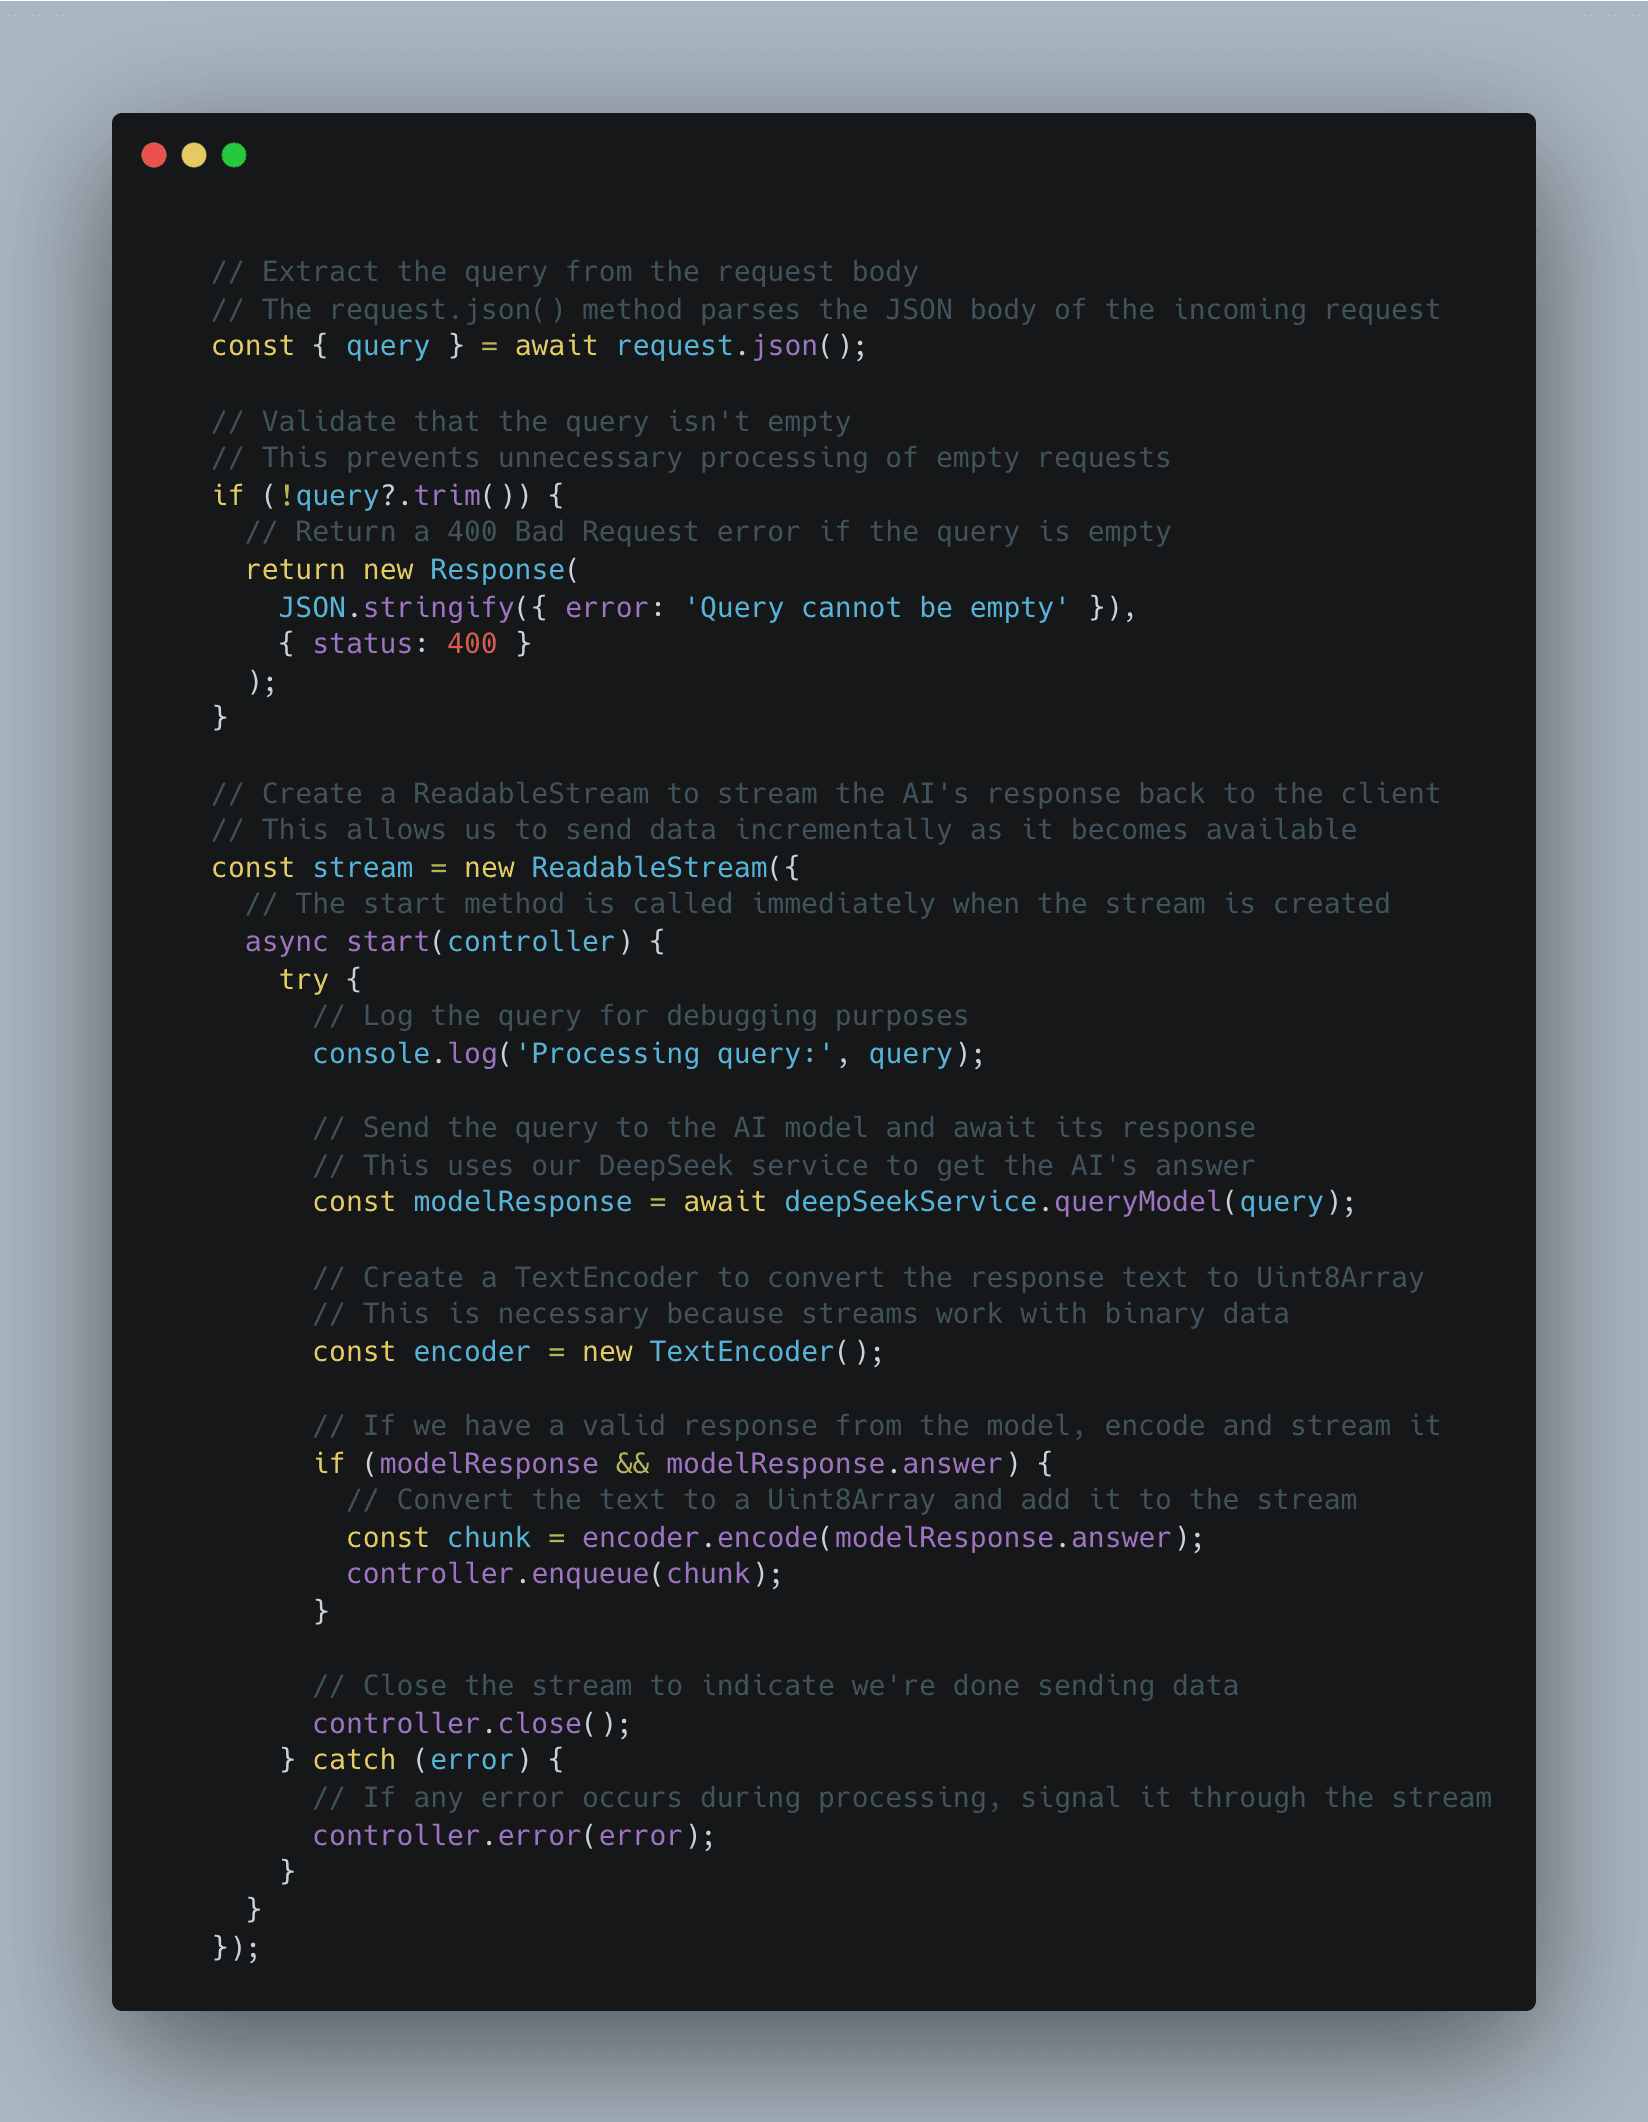
Finally return the streaming response with appropriate headers, catch any errors and config API route settings to your liking.
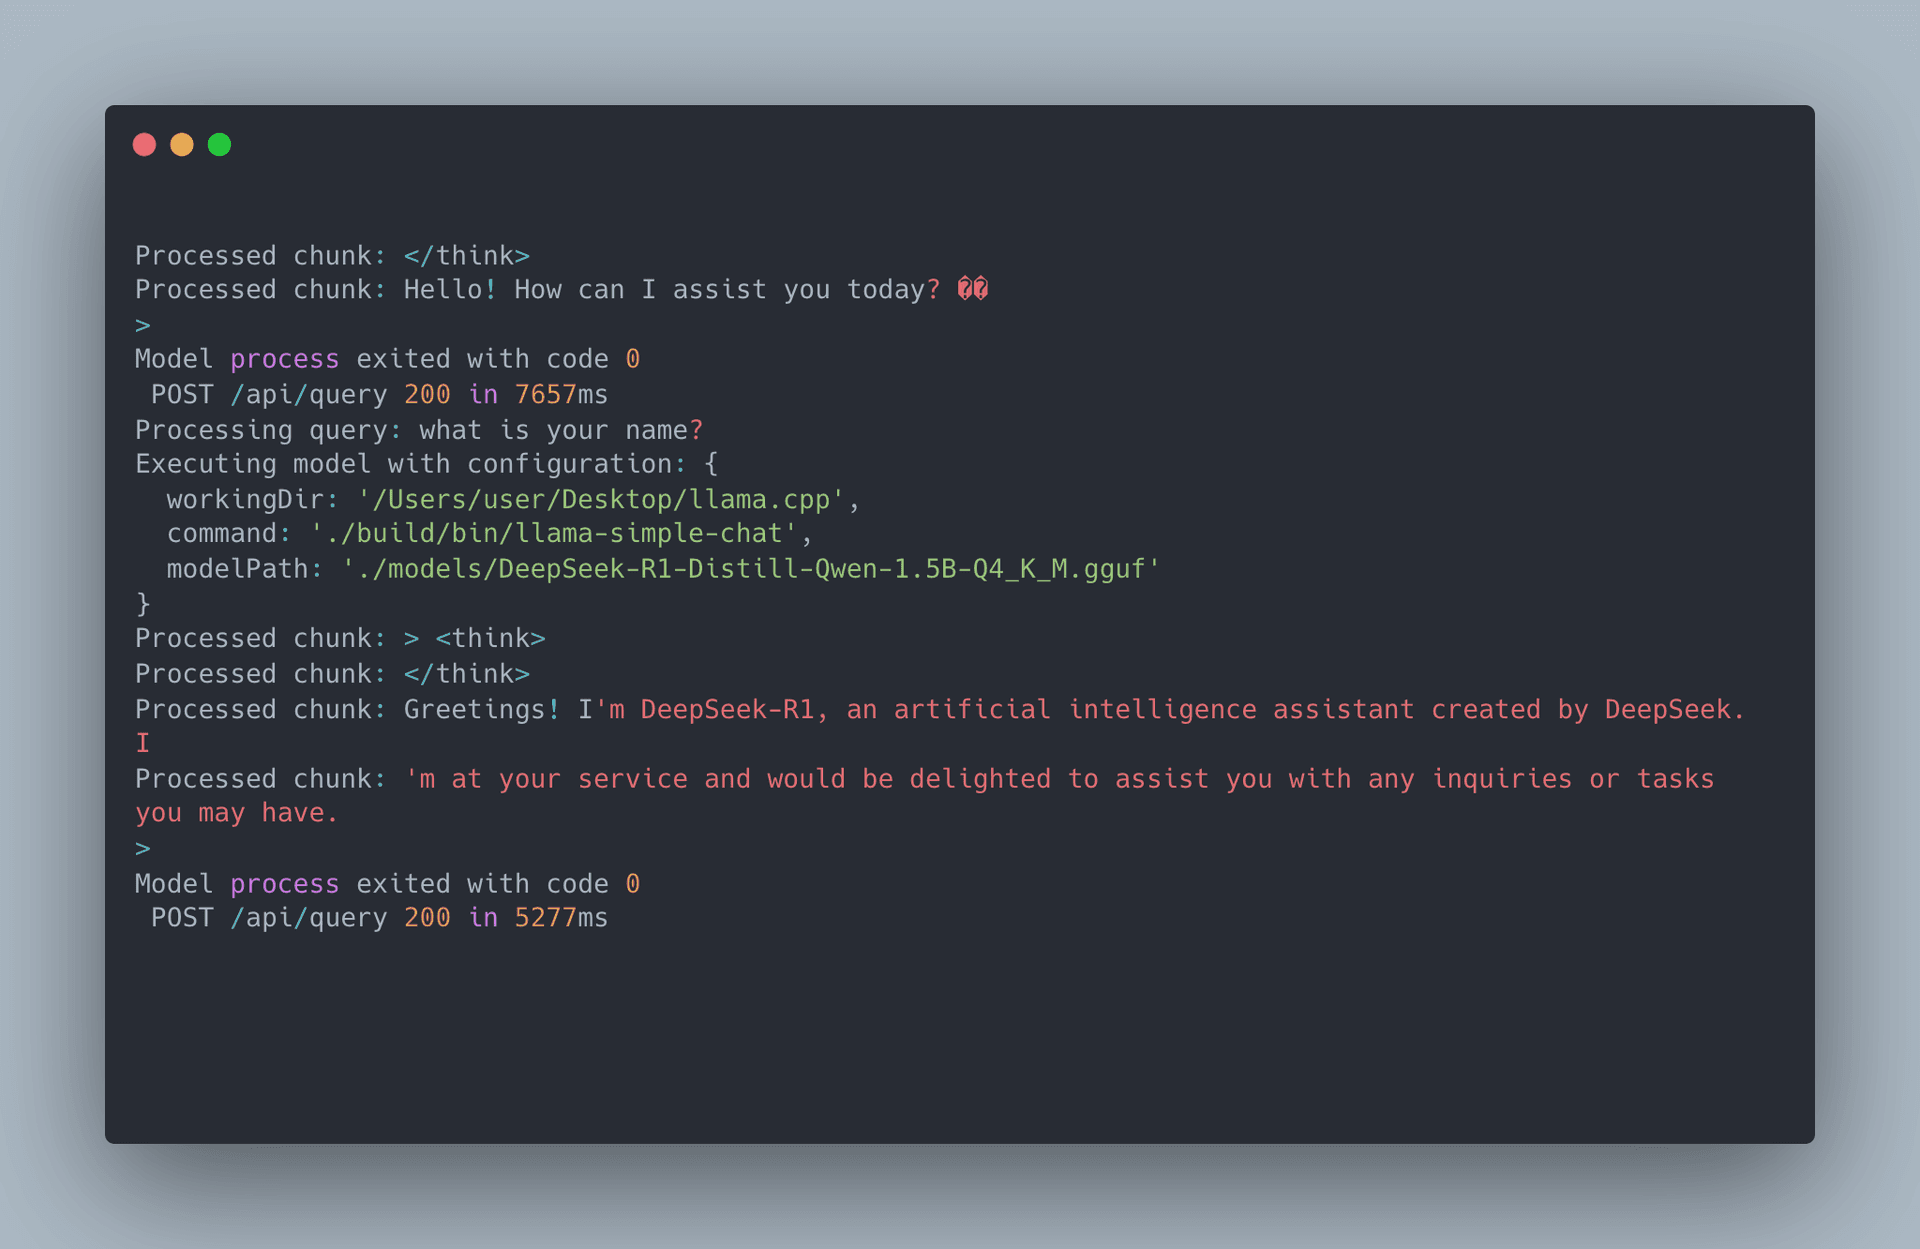
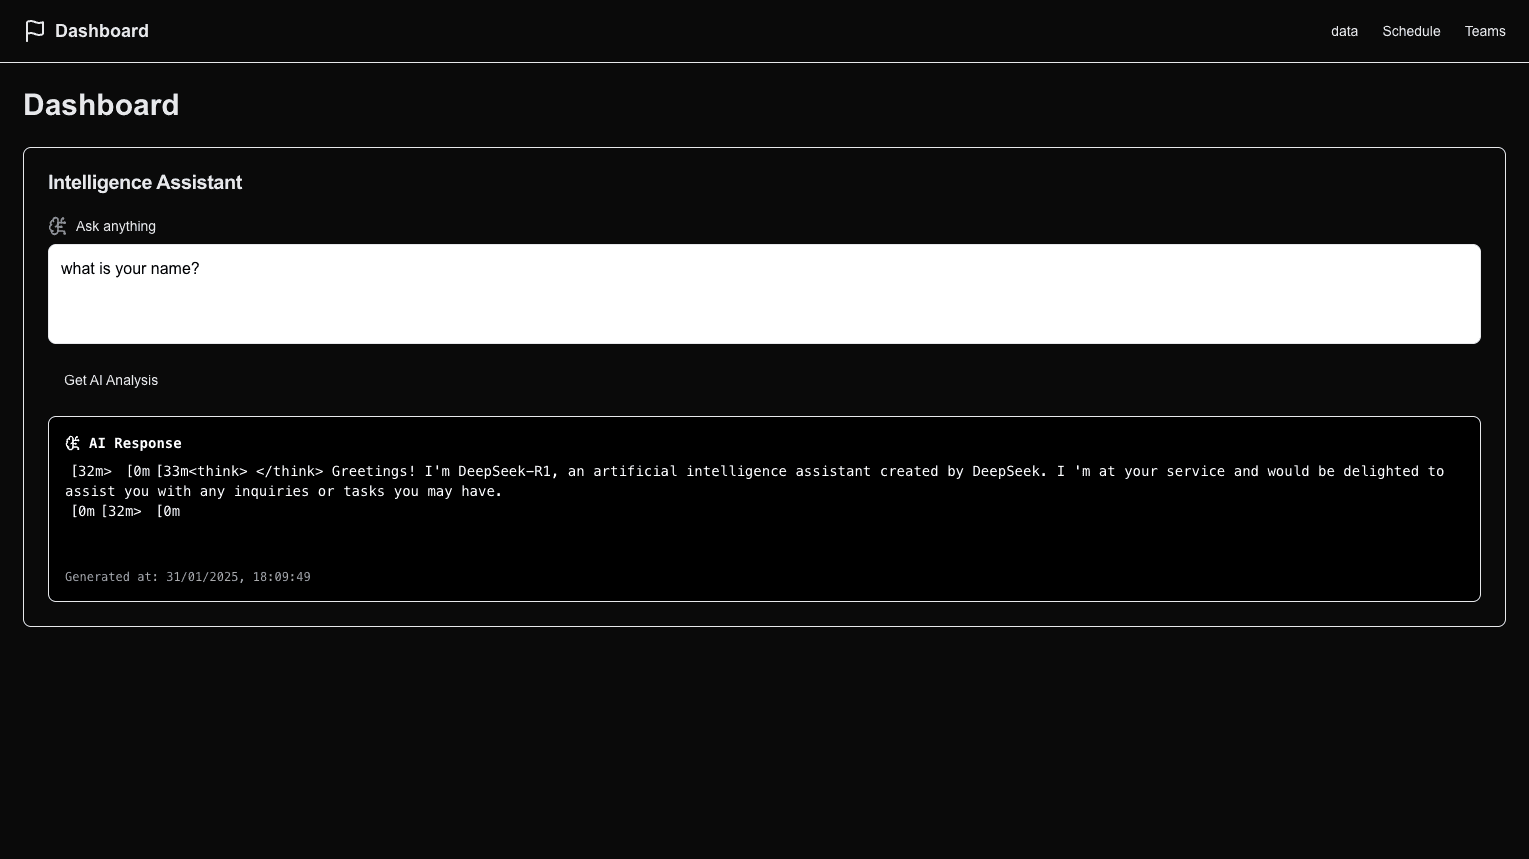
As you can see that is it. Here is my terminal to show you the backend is working we placed console logs in the modelService.js to ensure we were getting the response along with my frontend.
Conclusion
Building a Next.js application with LLM integration is an exciting challenge that combines frontend development with AI-driven backend services. Throughout this guide, we covered the fundamentals of setting up a project, integrating a local LLM using DeepSeek 1.5B, and creating a seamless query interface.
If you're interested in exploring the full source code check out the repository here:
I hope this guide was helpful! Feel free to reach out with questions, suggestions, or improvements. Happy coding! 🚀